Ever wondered how some collectors capture those stunning photos of their anime figures that look almost like official product shots? If you want to achieve the same result, this guide will walk you through important techniques to transform your figure photography from simple snapshots to artistic masterpieces, whether you want to showcase your prized collection on social media or keep track of your growing hobby.
Why Photograph Anime Figures
So, let's first understand what makes figure photography such a rewarding hobby. Whether you're a casual collector or a serious enthusiast, there are compelling reasons to pick up your camera and start shooting.
Showcase Your Collection
Good pictures can connect you with other collectors and get people to follow you in the community. A lot of collectors have built large followings on social media by regularly posting well-shot pictures of their collections.
Make Creative Expression
Figure photography gives you a lot of ways to tell creative stories. You can re-create famous anime scenes, make up your own stories, or experiment with artistic techniques. Some photographers even blend figures from different series to make unique crossover scenes.
Preserve Memories
Good pictures are a great way to keep track of your collection, especially for rare or limited-edition items. This can be very helpful for insurance purposes or if you ever want to sell pieces in the future.
Set Proper Lighting to Improve Your Anime Figure Photography
The right lighting setup can enhance details, create mood, and bring your figures to life.
Utilize Different Types of Lighting
Natural light is not only free but also provides some of the most beautiful and flattering illumination for your figures. To make the most of it:
- The best time for shooting is during the "golden hours" - early morning or late afternoon - when the sunlight is soft and warm.
- Position your figure near a window, but avoid direct sunlight that can create harsh shadows.
- For diffusion, hang sheer curtains over your window; they'll transform harsh rays into a gentle, even light that wraps beautifully around your figures.
- On cloudy days, you'll find nature provides the perfect softbox effect, creating ideal conditions for shooting.
While natural light is wonderful, it's not always available or consistent enough for your needs. Artificial lighting gives you complete control over your shooting environment.
- LED strip lights in the 3000K-5000K range provide excellent base illumination, while small LED panels offer precise control over light placement.
- A quality desk lamp with an adjustable arm can be particularly versatile, and you can experiment with different angles and heights.
- Ring lights can create attractive catchlights in figures' eyes and provide even frontal illumination.
Set Effective Lighting Orientations
Different lighting positions create various effects:
- Front lighting reveals details clearly, but it can make your anime figure look flat and two-dimensional.
- Side lighting adds shadows that create depth and drama. This type of lighting is perfect for figures with interesting textures or sculptural details.
- Backlighting looks great on figures with translucent parts or flowing hair, creating an ethereal effect.
For professional-looking results, consider three-point lighting: combine a main light, fill light, and backlight to achieve balanced, three-dimensional illumination.
Experiment with Reflectors
Don't underestimate the power of reflected light! Simple tools can make a big difference:
- A piece of white paper or foam board bounces soft, diffused light.
- Aluminum foil provides stronger reflection for darker areas.
- If you're ready to invest in your setup, professional reflector discs offer multiple surfaces (silver, gold, and white) for different effects.
- Even a small mirror can help direct light precisely where you need it.
Choose the Right Angles for Anime Figure Photography
The angle you choose can also dramatically change how your figure appears in photos. Here are various perspectives that can help you capture your figures in their best light.
Eye-level
When you shoot at eye level, it's like having a conversation with your figure – this creates a natural, friendly feeling that viewers can easily connect with.
Low Angle (Worm's Eye View)
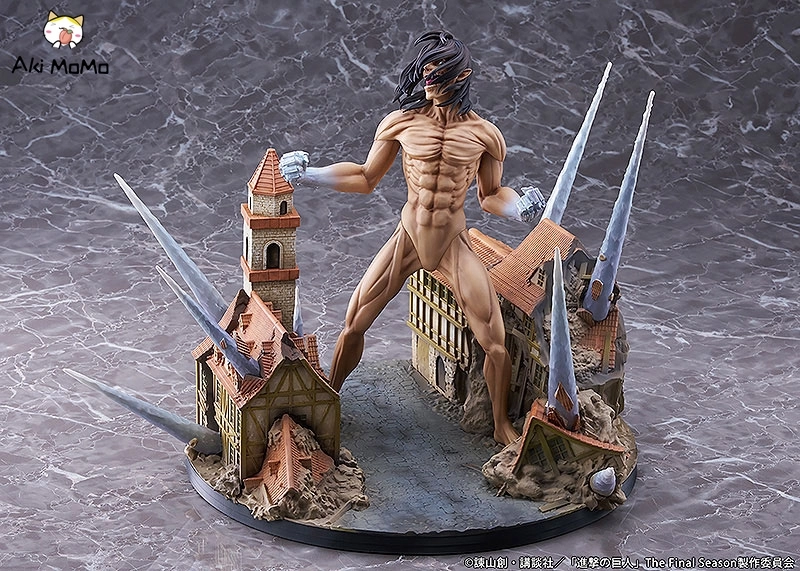
Want to make your figure look more powerful? Try getting down low and shooting upward, it can make figures appear powerful and imposing. For example, photographing an Attack on Titan Eren Yeager figure in his Titan form from a low angle can recreate those intimidating scenes where Titans loom over the walls.
High Angle (Bird's Eye View)
Or try shooting from above. This bird's-eye view works wonderfully for diorama-style setups or when you want to show your figure in their environment. Take Evangelion as an example, you could photograph NERV's Eva units from above to recreate those iconic moments when they're launched from their underground hangars.
Dutch Angle
Another recommended favorite techniques is the Dutch angle, where you tilt the camera slightly. This simple trick adds dynamic energy to action poses– imagine capturing Naruto mid-jump or Goku powering up for an attack.
To further tailor anime poses to angles, you can practice the strategies below:
- Consider these tips when positioning your figures:
- Check for awkward limb placement
- Ensure faces are visible unless intentionally hidden
- Align action poses with natural movement lines
- Use multiple angles for complex poses
Create More Engaging Figure Photos Through Composition
Now, let's explore how to compose your shots in ways that will make your photos more interesting and professional-looking.
Try the Rule of Thirds technique
Forget about always putting your figure in the dead center of your photo. Instead, think of your camera screen as being divided into a 3x3 grid (like a tic-tac-toe board). The magic happens when you place your figure along these lines or at their intersection points.
For example, if you have a figure looking to the right, try placing it on the left third of your frame. This creates a more natural, dynamic image and gives your figure "room to breathe" in the direction they're facing. The empty space (what photographers call negative space) is just as important as the figure itself. It helps tell the story and creates balance in your image.
Create Natural Flow in Your Anime Figure Photos
Look for natural lines in your figure's pose – maybe it's the sweep of a cape, the angle of a sword, or the direction of a pointing arm. These elements can create invisible lines that lead viewers through your photo.
Props can be your best friends here. A simple stand or base can create a strong horizontal line, while a backdrop might provide vertical elements. If your figure is wielding a weapon or has flowing hair, try aligning these with your composition to create a more cohesive image. For instance, if your figure is holding a spear diagonally, you might angle your shot to make that line flow from corner to corner.
Add Depth and Layers to Your Photos
A flat picture is like a dull play on stage. Think about layers: foreground, middle ground, and background. This will make your pictures more interesting.
To frame your figure, try putting small things in the foreground, like rocks or leaves. A simple piece of colored paper or a printed backdrop can be used for the background. If you use a camera, changing the aperture (f-stop number) can help blur these things to give the impression of depth without drawing attention away from the main subject.
Create the Perfect Scene for Your Figure Photography
Creating the right environment for your figure photos can transform a simple snapshot into a captivating image.
Master the Basics with Simple Backgrounds
The simplest approach often works best – a solid color background can create a clean, professional look that lets your figure take center stage. For instance, a deep blue background could make Demon Slayer's Rengoku's flame-colored hair and uniform stand out dramatically.
Improve Your Scene with Printed Backdrops
If you're feeling more adventurous, printed backgrounds can add context and atmosphere to your shots. Imagine photographing a Gundam figure against a Neo Tokyo cityscape. For One Piece figures, a simple ocean horizon backdrop can instantly set the maritime adventure tone.
Build Character Stories Through Props
Think of props as supporting actors in your figure's story. When selecting props, consider what would naturally appear in your character's world. For example, when photographing a Nendoroid of Spy x Family's Anya Forger, you might include tiny books and school supplies to recreate a scene from Eden Academy. For a Jujutsu Kaisen figure, adding small cursed energy effects or miniature shrine elements can enhance the supernatural atmosphere. A My Hero Academia dorm room scene might include tiny All Might posters and hero costume elements, while a Genshin Impact character could be enhanced with props that reflect their vision element or region.
Create Custom Scenes on a Budget
Custom-made diorama pieces can take your scenes to the next level, but don't feel like you need to break the bank. For example, you could design a mini UA High School classroom corner for your My Hero Academia collection.
Note: Just remember that the background should enhance your figure, not compete with it. When in doubt, try slightly blurring your background (either through camera settings or by physically placing it farther away) to create depth while keeping the focus on your figure.
What Else Tools and Techniques Do You Need to Start Figure Photography?
Getting started in figure photography doesn't require a fortune in equipment. Let's explore both the essential tools and how to make the most of them through post-processing.
Choose Your Shooting Equipment
Your journey can begin with something as simple as a modern smartphone. The latest phones often pack impressive macro capabilities that are perfect for figure photography. If you're ready to step up, an entry-level DSLR or mirrorless camera with a kit lens will serve you well. For those focusing on details, consider investing in a macro lens or cost-effective close-up filters.
Ensure Stability and Sharpness
Sharp images can't leave a good support system essential. A mini tripod is perfect for tabletop setups, while a flexible tripod can help you capture unique angles. If you're using a smartphone, a dedicated phone holder can greatly improve your results.
Maintain Your Photography Kit
Here's a quick reference guide for keeping your equipment and figures in top condition:
| Tool Type |
Purpose |
Recommended For |
| Soft Brush |
Dust removal |
Figure surfaces |
| Microfiber Cloth |
Gentle cleaning |
Lenses and displays |
| Air Blower |
Non-contact cleaning |
Delicate details |
| Cotton Swabs |
Precision cleaning |
Hard-to-reach areas |
Master Basic Post-Processing
Think of post-processing as the final touch to your photography. Here's a simple workflow to follow:
- First, begin with exposure adjustments. Adjust brightness and contrast to make your figure stand out naturally
- Next, move on to color fine-tuning. Correct white balance to ensure accurate color representation
- The third step focuses on detail enhancement. Apply careful sharpening to bring out textures without creating artifacts
- Finally, polish your background. Consider subtle blur adjustments to create depth
Start Your Journey as an Anime Figure Photographer
Not everyone can take great pictures of figure overnight. It takes practice, experimentation, and patience to develop your style. Learn the basics, try out different methods, and most of all, enjoy yourself!


![Good Smile Company GSC Nendoroid Evangelion: 2.0 You Can [Not] Advance Rei Ayanami: Plugsuit Ver.](http://ueeshop.ly200-cdn.com/u_file/UPBC/UPBC355/2501/07/photo/32f66f4917.webp)


