Innovative Techniques for Customizing Figures and Toys
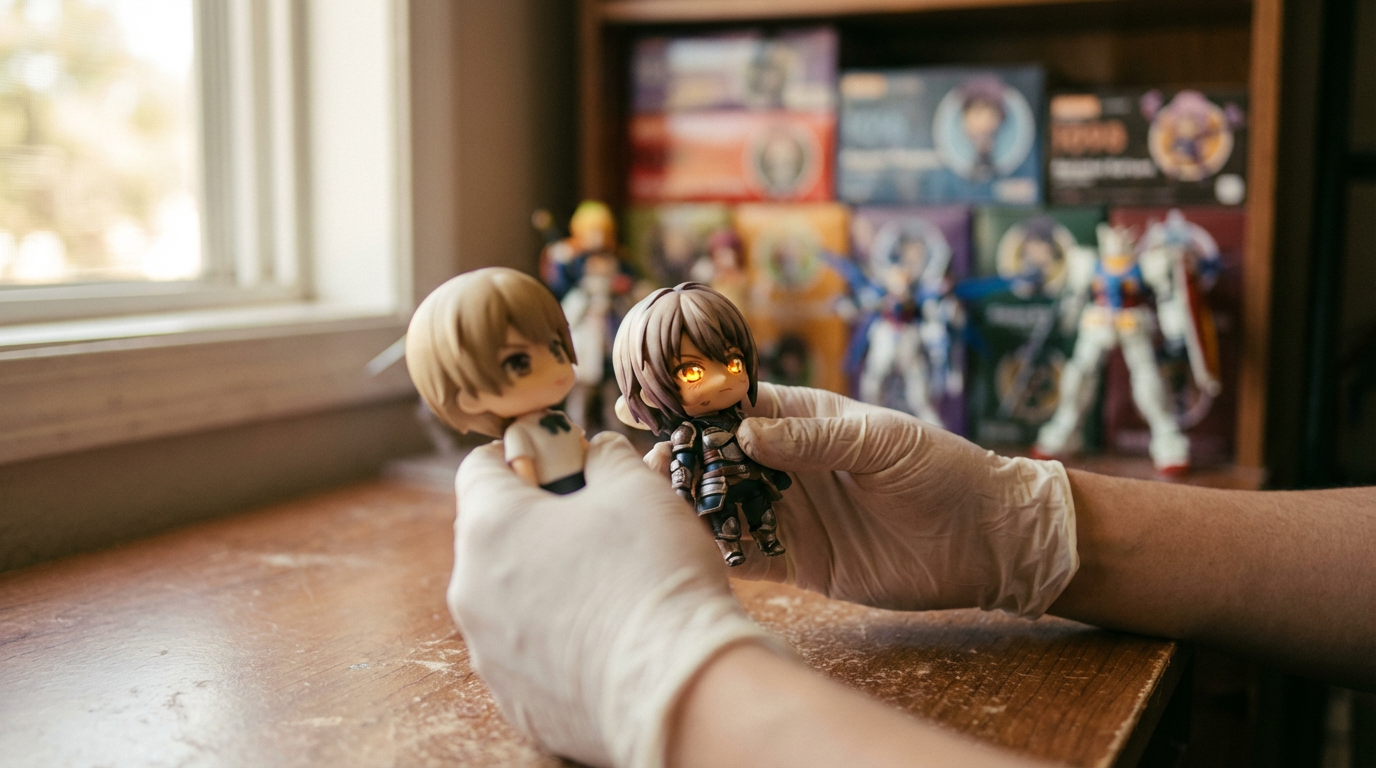
If you have ever stared at a mass-produced anime figure and thought, “You’d be perfect if I could just fix that face, tweak that pose, and give you the outfit you actually deserve,” then you are already in customizer territory. Customizing is where fandom spills off the screen and into three dimensions, where you stop being only a collector and become a co-creator. In this deep dive, we will walk through innovative, practical techniques for transforming stock figures and toys into one-of-a-kind characters, anchored in the methods used by experienced kitbashers, sculptors, painters, and toy designers.
This is not theory from a distance. The techniques come from long-running customizing communities, professional guides, and design research: painting walkthroughs like Jin Saotome’s custom figure guide, beginner-focused customizing tutorials from sites such as Instructables and Demeng Toy, materials advice from forums like Rebelscum and Technodrome, and toy-design and playability research from places like PlasticToyFactory, ArtCenter College of Design, and academic work on character toys. Together, they map out a modern toolkit for anyone who wants to push their figures far beyond out-of-the-box.
Why Customizing Hits Different Than Store-Bought
Action figure and statue customization is simply the process of taking an existing toy or base body and modifying it into something more personal. Guides from Demeng Toy and PlasticToyFactory frame it as a spectrum: on one end, simple repaints and accessory swaps; on the other, fully resculpted bodies or 3D-printed originals. Either way, the goal is the same. You are using that figure as a canvas to tell a story the factory never did.
Customdesignsboxes describes customization as a response to a very real problem: factory figures are built for mass appeal, not individual identity. Limited color choices, generic expressions, and safe outfits flatten characters, especially nuanced anime heroes and villains. Custom work lets you dial in personality, capture specific moments from manga chapters or episodes, or mash up fandoms into something only you would dream up. Personalized action figure services such as My3dSelfie lean on the same emotional core when they turn people, pets, or original characters into bespoke figures for events like weddings or graduations. Whether you do it yourself or collaborate with a service, the appeal is the same: this character is yours.
Customization also changes how you relate to your collection. Instead of just buying new pieces, you start revisiting older figures, “fixing” them with better colors, new heads, or custom packaging. Guides on Instructables literally frame it as “bringing life back” to old toys. That mindset is powerful for anime collectors, where character design and tiny details matter almost as much as the sculpt itself.
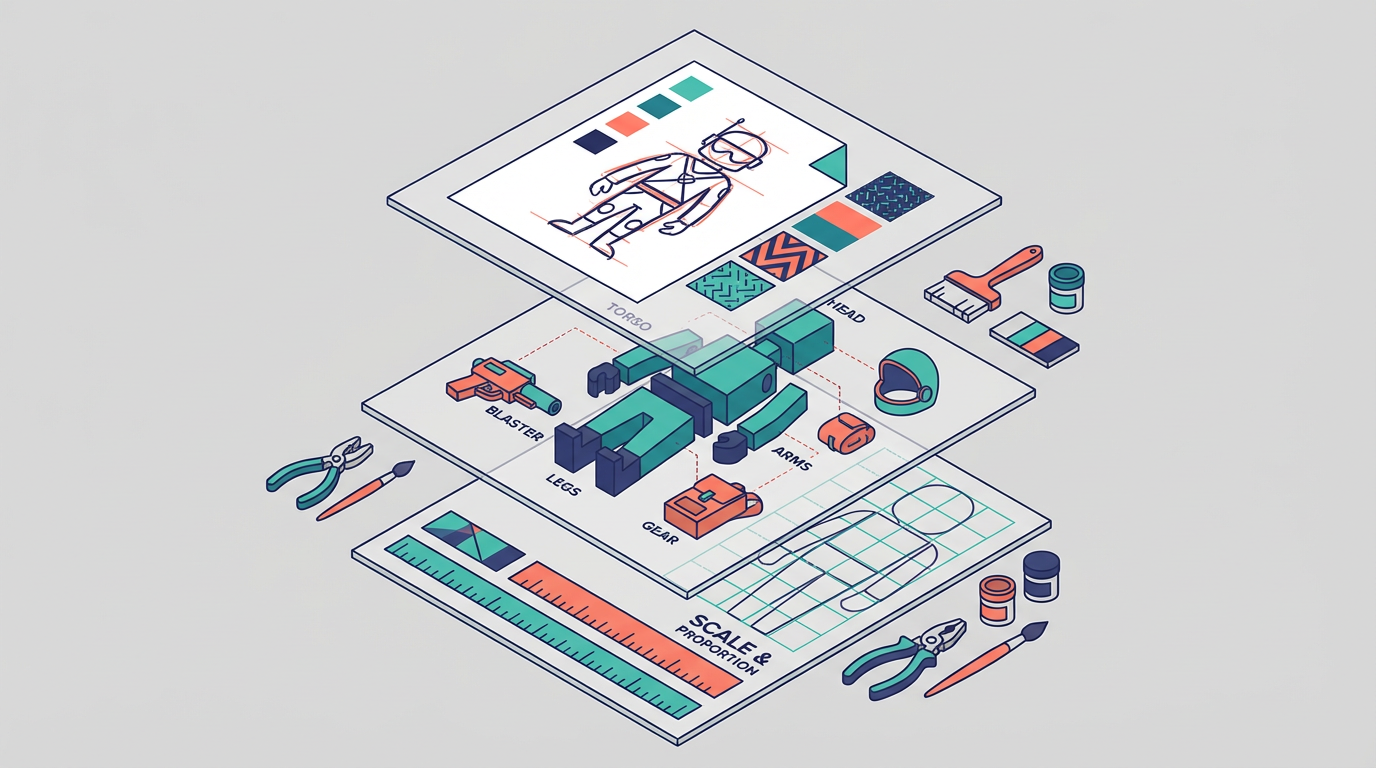
Start With Story: Planning Characters, Scale, and Pose
Before you pick up a brush or open your favorite 3D software, you need a plan. The most innovative customs do not start with paint; they start with story.
Character, Lore, and Research
Customdesignsboxes suggests beginning with a clear character concept: sci‑fi soldier, shonen rival, magical girl, cyberpunk merc, or maybe a new original idol. From there, you research their world using reference from anime, manga, artbooks, games, or concept art. Character design resources such as the National Film Institute’s overview of character design emphasize understanding personality, motivation, and role in the story. That work pays off in customs too, because it informs everything from silhouette to color palette and accessories.
Character design research points to three core visual levers: silhouette, color palette, and purposeful exaggeration. A strong silhouette lets your custom read at a glance on the shelf, even in a dimly lit Detolf cabinet. A focused palette, driven by one main color and a few supporting tones, prevents your repaint from turning into a noisy rainbow. Exaggeration means you choose what to push: perhaps sharper shoulder armor, slightly longer coat tails, or more pronounced hair spikes, so the figure instantly broadcasts “hero,” “villain,” or “trickster.”
Choosing Scale and Base Bodies
Scale determines which parts, accessories, and “fodder” you can mix. The ActoyDesign basic customizing guide recommends choosing scale first, calling out six‑inch lines like Marvel Legends and DC Universe Classics as beginner friendly. Customdesignsboxes broadens this to common scales such as roughly 1/6, 1/12, and 1/18, which cover most articulated anime‑style figures and Western lines.
Once you know scale, you pick a base body. PlasticToyFactory stresses understanding figure anatomy and joint types—ball, hinge, swivel—plus materials like PVC, ABS, or softer rubber. The right base body determines how well your custom can move and how much resculpting you will need. For anime work, a neutral six‑inch base with clean joints can be repainted into a surprising range of characters with the right hair, head, and costume modifications.
Fodder and Kitbashing Strategy
In customizing circles, “fodder” means spare parts: extra heads, hands, weapons, belts, capes, and random bodies from sales bins or online lots. ActoyDesign treats fodder as a foundational resource, recommending that you store it clean and sorted because you will regularly buy an entire figure just for one part.
Demeng Toy and PlasticToyFactory both champion kitbashing, which is the art of combining parts from different figures or toy lines to create something entirely new. The innovative part here is mental, not technical. Once you start seeing a wrestling figure’s arms as potential shonen protagonist limbs, or a sci‑fi line’s backpack as the perfect mecha shroud for your custom Gunpla‑adjacent character, your options explode.
A practical approach that many customizers use is to sketch the character in a few dynamic poses first (PlasticToyFactory explicitly recommends this), then write down which fodder parts can stand in for each element. You might decide that a certain cape from a Western superhero line, a pair of boots from a wrestling figure, and a stylized sword from an older fantasy line will combine into your dream anime antihero. Planning this on paper keeps you from hacking apart rare figures only to realize the proportions clash.
Tooling Up: Modern Materials and Safe Setups
Even a wildly imaginative custom dies on the workbench if the materials cannot keep up. Several guides converge on a modern, relatively affordable toolkit.
Workspace and Safety Basics
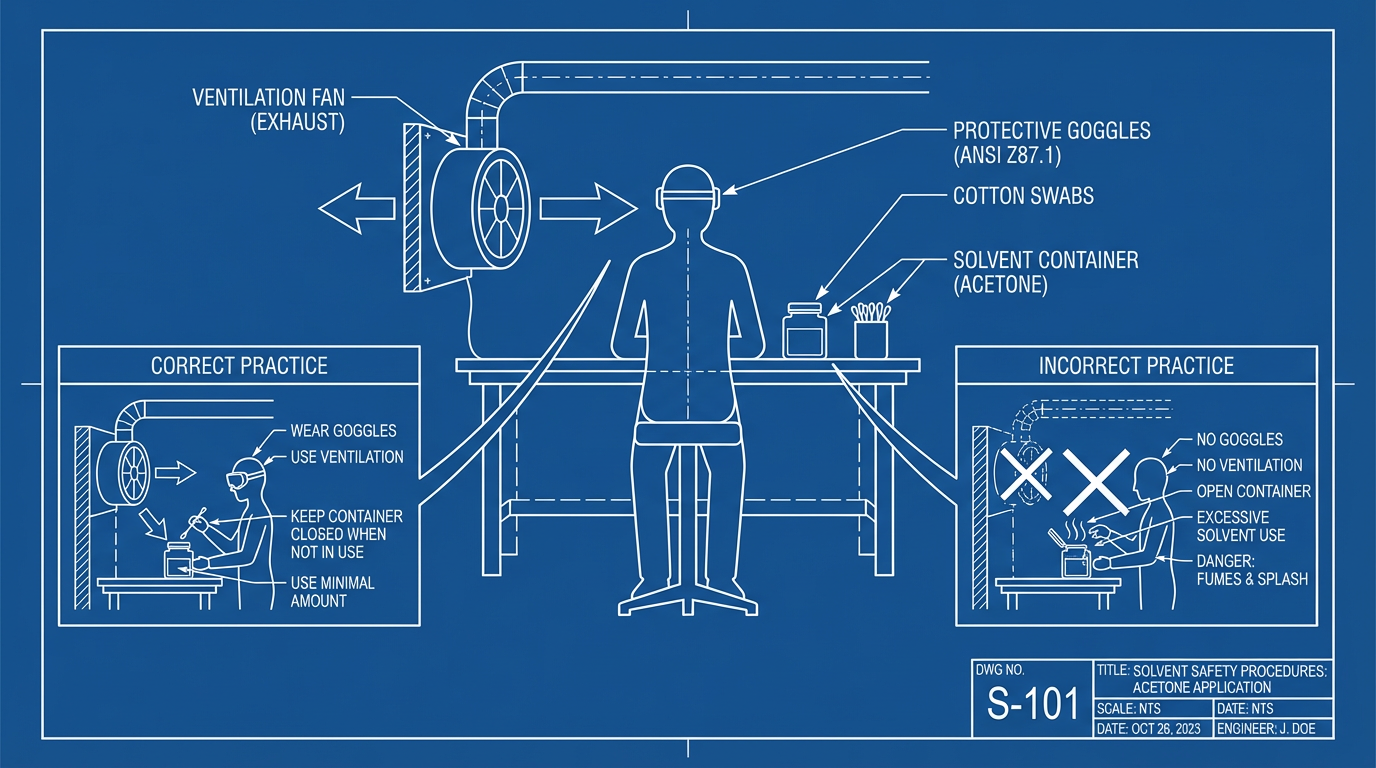
ActoyDesign notes that at minimum you need a flat work surface and decent lighting. As your hobby grows, that might expand into separate zones for building, painting, photography, and fodder storage. A key constant across sources, from Jin Saotome’s painting guide to We‑R‑Toys’ safety‑focused advice, is ventilation and basic protective gear. Sprays, primers, and solvents like acetone are not things you want concentrated in a small bedroom.
Industrial‑grade solvents deserve particular respect. The ActoyDesign guide explains that acetone, which you might recognize from nail polish remover, can strip paint very effectively but can also soften or melt certain plastics and is bad news for your eyes and skin. Safe practice is to decant a small amount into a separate container and apply it with cotton swabs or paper towels, wearing eye protection and avoiding long exposure, instead of pouring it directly on the figure.
For sculpting, heating, and sanding, Technodrome forum advice on making a rough‑play‑safe custom for a child emphasizes durability and safety: sand epoxy with fine grit such as 800‑grit paper to smooth edges, use kid‑safe paints once fully cured, and seal parts so that no flakes or chips come off during play. We‑R‑Toys’ guidance on Masters of the Universe customs adds common sense precautions: soften joints with warm water or a hair dryer rather than open flames, avoid harsh chemical strippers, and keep sharp tools and chemicals away from kids and pets.
Paints, Primers, and Brushes
Most modern customizers treat water‑based acrylics designed for models and miniatures as their default. ActoyDesign and Technodrome both highlight brands such as Testors Model Master Acryl, Formula P3, Vallejo, and Citadel as durable, figure‑friendly options. Demeng Toy’s walkthrough underlines the same pattern: acrylics, primer, and clear sealant are the core trio.
ActoyDesign suggests starting with small jars around a quarter to half an ounce, which often run roughly three to four dollars each, and building a versatile set rather than trying to buy every color. Mixing your own shades is not just economical; it also helps you match tricky anime hair and eye colors that rarely exist straight out of the bottle.
Priming is one of the most underrated innovations in beginner customs. On Rebelscum, painters explain that primer is especially important after you have cut, sanded, or reshaped a figure, because it unifies the surface, reveals flaws, and gives your paint a better grip. Even on untouched factory plastic, a good primer improves adhesion and reduces the chance of paint rubbing off joints. Automotive‑style adhesion promoters like Bulldog or Duplicolor, noted in Jin Saotome’s guide, bond strongly to hard plastic but must be used outdoors and never on soft rubber parts due to toxicity and chemical interaction.
Brush choice matters more than most newcomers expect. ActoyDesign recommends starting with inexpensive multi‑size brush packs and then upgrading selectively as you discover what you like. Jin Saotome cautions against stiff, cheap model brushes, recommending soft natural‑bristle detail brushes instead. Across sources, one practice is universal: rinse your brush regularly as you paint, wash with mild soap and warm water when you are done, and accept that even good brushes will wear out every month or two with heavy use.
Solvents and Paint Types: Pros and Cons
Different paint chemistries behave very differently on toys. Jin Saotome’s breakdown is blunt: industrial PVC factory paints sit at the top of the durability chart, but they are extremely toxic in liquid or atomized form and not accessible for hobby use. Below that, lacquers cure fast and strong but use harsh thinners and may attack some plastics. Acrylics sit in the sweet spot for customizers: they clean up with water, dry to the touch within minutes, and fully cure in a couple of hours, while remaining flexible enough for softer plastic and rubber when used correctly. Enamels, despite their popularity in older model kits, are flagged as the worst choice for soft PVC and rubber because they can stay tacky and off‑gas fumes for days.
For innovative customs, the trick is often combining the strengths of different products without falling into their traps. One common workflow, outlined by Jin Saotome and echoed in forum advice, uses a plastic‑safe primer, acrylic or lacquer base coats for coverage, and then acrylic layers for details. Finally, a clear coat such as Testors Dullcote or a premium flat or semigloss varnish like Mr. Hobby’s line or Vallejo’s clear acrylic resin protects the finish and tunes the surface sheen.
Next-Level Surface Work: Priming, Shading, and Finishes
Once your materials are set, the creative part begins: turning an ordinary figure into something that looks like it stepped out of a panel or key animation frame.
Preparing the Plastic Canvas
Almost every serious guide starts with washing the figure in warm, soapy water. Jin Saotome recommends using gentle soap with a soft brush to scrub away mold‑release agents that factories use to eject figures from molds. Those invisible oils are one of the main reasons beginner paint jobs flake off.
If you plan heavy modifications, Rebelscum contributors advise assembling the figure in final form before detailed painting, especially if you need to use a “boil and pop” method to reinsert joints. Boiling a fully painted figure to reassemble it is a fast way to destroy a finish and cloud your seal coats. For simple repaints, many painters do base coats on separate parts but wait until assembly for tricky alignment details, such as panel lines or weathering.
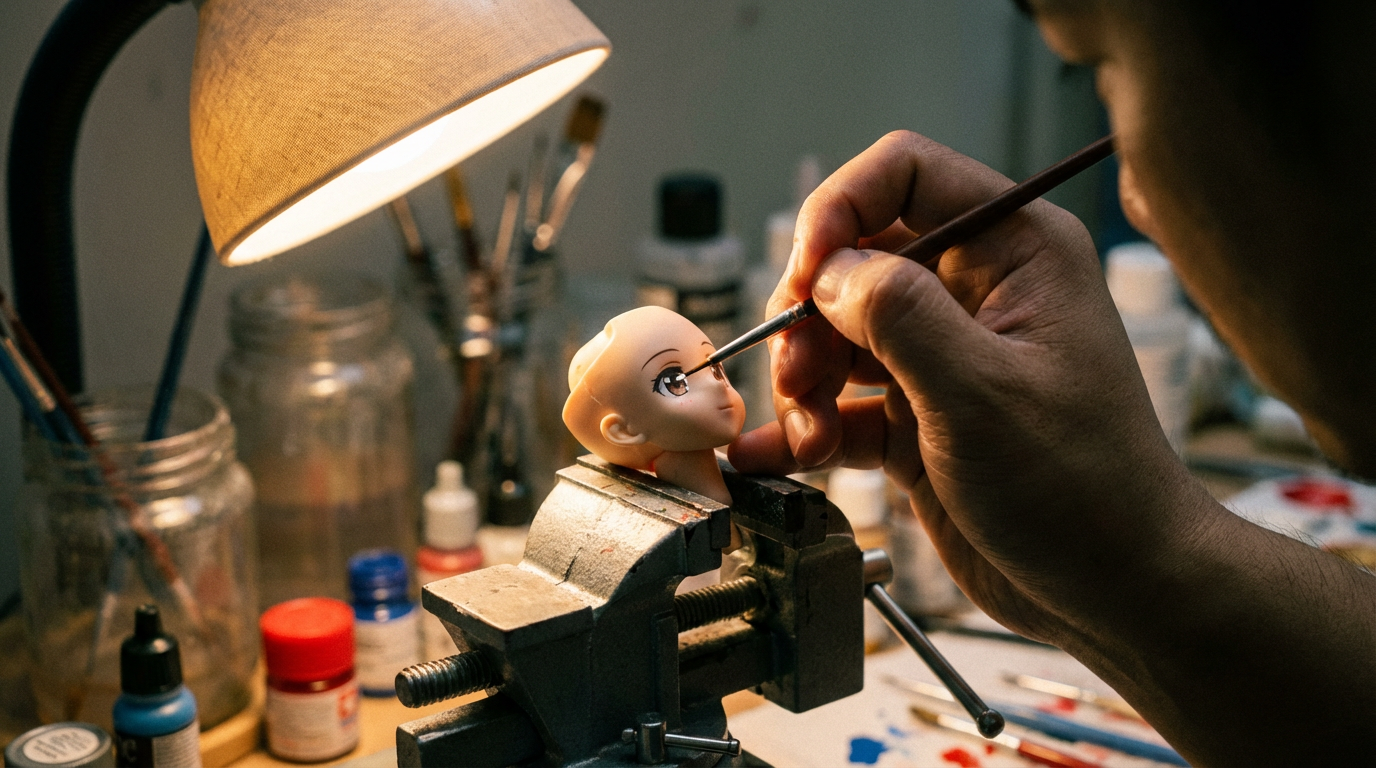
Painting Like a Comic Panel on a 3D Figure
Jin Saotome’s philosophy is to think like a comic colorist: you are not only filling in flat areas, you are painting light and shadow. That approach works beautifully for anime figures too. Instead of one solid red for a jacket, you plan three: a deep red in recesses, a mid‑tone for most surfaces, and a bright red on edges and raised folds.
Demeng Toy’s step‑by‑step advice matches this layered mindset. After priming and a base coat that establishes the overall scheme, you add highlights, shadows, and special effects using techniques such as dry brushing and washes. Thin your acrylics slightly with filtered water rather than slathering on one thick coat. Jin Saotome suggests two to four thin layers as a good baseline. Thinner paint flows better, avoids obscuring sculpted detail, and cures into a more durable film.
Light colors over dark plastic are a special challenge, especially for anime figures with pastel outfits over dark base bodies. A widely used trick, called out by Jin Saotome, is to lay down a white or light gray base before painting colors like yellow or pale pink over black or deep blue plastic. Without that buffer, the dark substrate will show through no matter how many layers you add.
Controlling Shine With Clear Coats
Nothing kills an otherwise gorgeous repaint like unintentional plastic shine on a character who should look like cloth or worn armor. Forum regulars and Jin Saotome both lean on matte clears to pull everything together. Testors Dullcote is a forum favorite for removing shine and giving that subtle factory‑like finish, while lines such as Mr. Hobby Premium Flat and Semigloss are praised for making customs blend in next to high‑end Figma or S.H.Figuarts releases.
Gloss and satin finishes still have their place. Rebelscum painters recommend applying local gloss or satin by brush over a full matte coat when you want specific elements to pop: glossy boots, shiny armor panels, wet-looking eyes, or polished metallic trim. They warn against masking and re‑spraying over a finished paint job whenever possible, since even high‑quality painter’s tape can lift paint and clear coat off plastic. A more innovative approach is mixing clear finishes in different ratios to get just the right sheen.
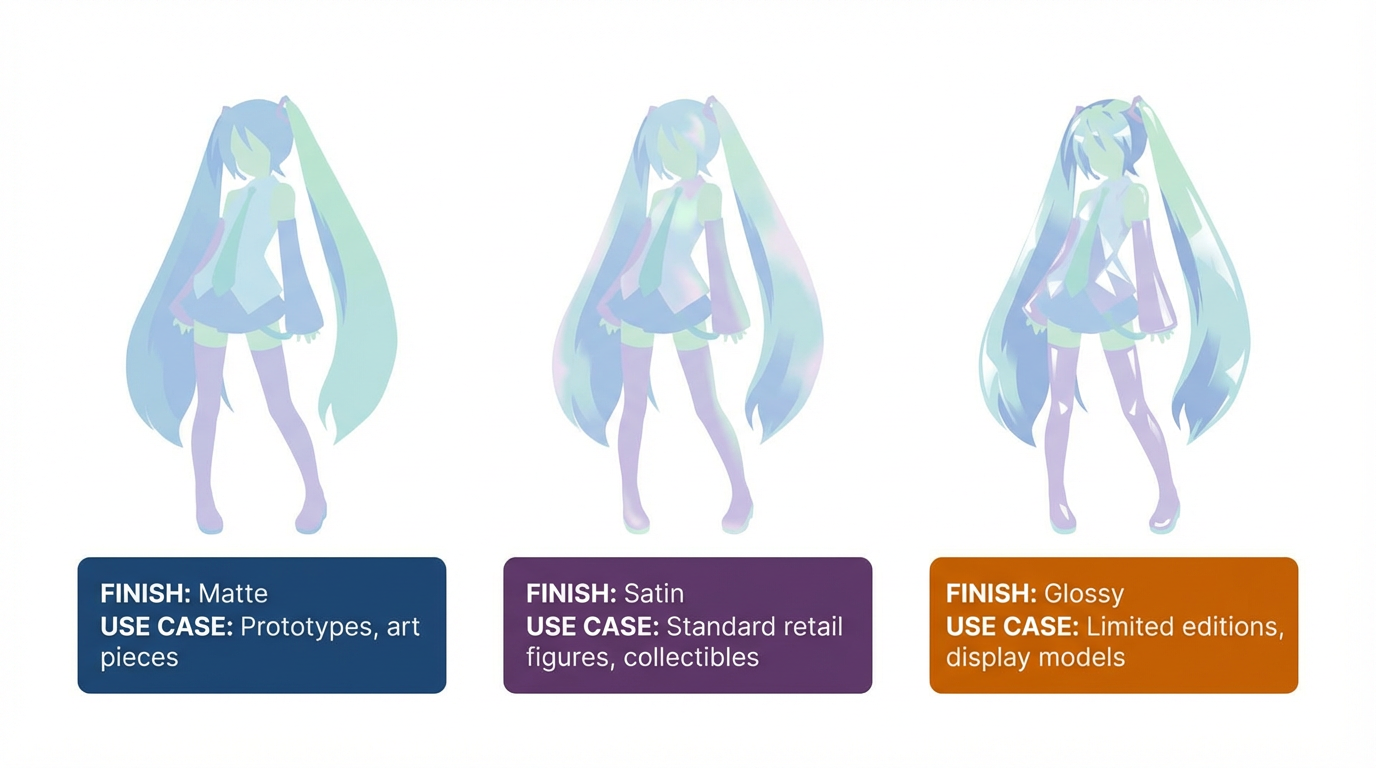
Equal parts gloss and flat often produce a satin, and shifting that ratio lets you tune shine without changing the color underneath.
A concise way to think about your options is to treat finish as another design choice, not an afterthought.
Finish type | Typical use on customs | Pros | Key cautions |
|---|
Matte clear (e.g., Dullcote, premium flats) | Clothing, skin, most anime figures | Removes shine, hides minor imperfections, looks “factory” | Some sprays are solvent‑heavy; use only on hard plastics and in good ventilation |
Satin clear | Leather, some armor, realistic hair | Subtle sheen, good for semi‑gloss effects | Mixing different sheens over the same color can slightly change perceived color |
Gloss clear | Eyes, gems, patent leather, wet effects | Strong reflections, high drama | Looks toy‑like if over‑used; easier to chip on flexible parts |
Sculpting, Epoxy, and Polymer Clay Hacks
Paint will only take you so far. When you want to change silhouettes—adding armor, creating custom hair, or building original characters—you move into sculpting.
Epoxy for Armored and Play-Safe Customs
For robust play pieces, Technodrome customizers almost unanimously recommend Aves Fixit Sculpt from the Aves epoxy line. One experienced customizer notes that a piece of Fixit Sculpt about a quarter inch thick is so tough that an adult has to lean their body weight over a desk edge to break it, which implies a child is extremely unlikely to snap similarly thick parts during normal play. That makes it ideal for horns, armor spikes, or new limbs that need to survive toy‑box chaos.
The workflow looks like this. First, rough in the shape with armature or by building up over existing plastic. Second, refine contours while the epoxy is still workable. Once it cures, you wet‑sand with fine grit such as 800‑grit to get a paint‑ready surface. Technodrome posts then recommend quality hobby acrylics and a clear semigloss resin sealer from lines like Vallejo to protect the paint. For very high‑wear points like ear tips or finger claws, some customizers even brush on a thin layer of superglue and let it cure, creating a rock‑hard shell before painting.
This whole technique is a game‑changer for anime mecha and armored characters. Instead of waiting for a company to eventually make the obscure variant you want, you can build the armor plating yourself in epoxy that is strong enough for regular handling.
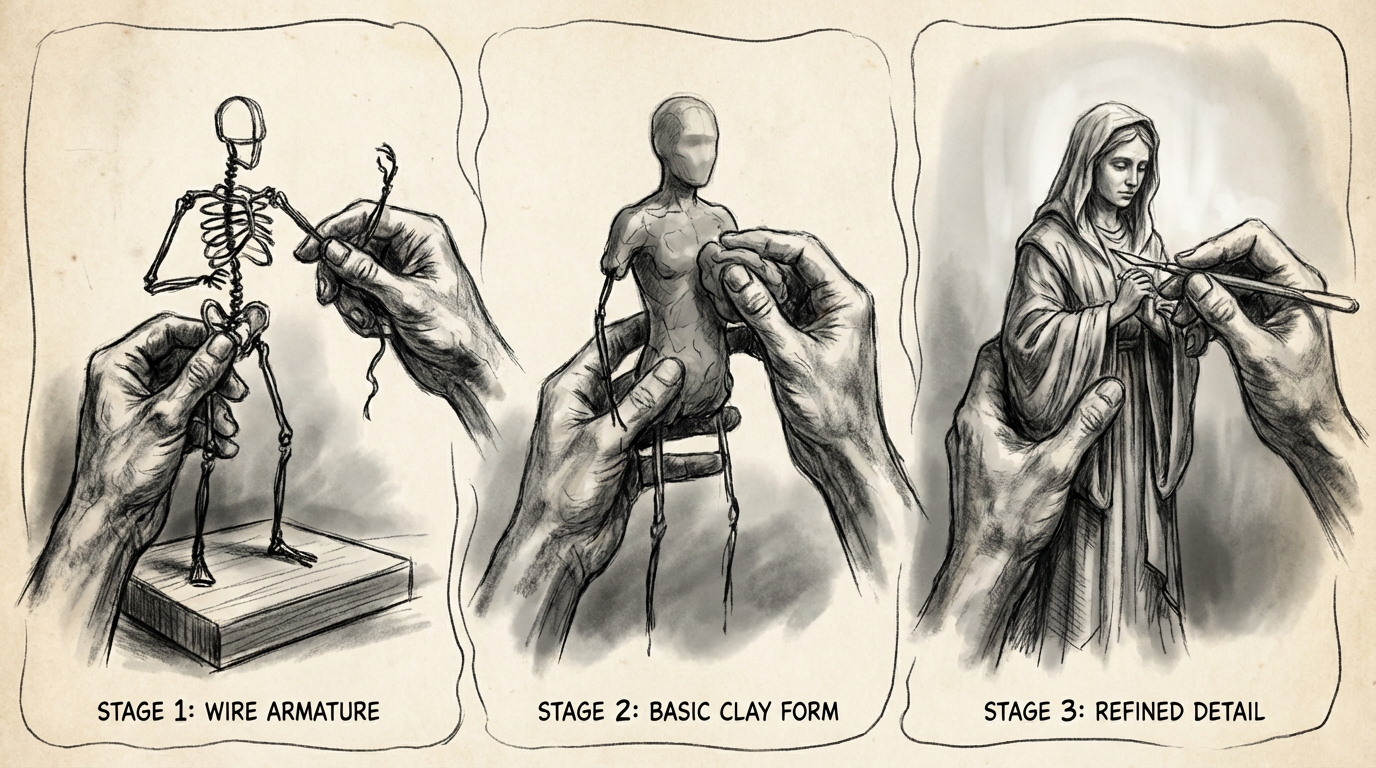
Polymer Clay and Full-Sculpt Figures
On the other end of the spectrum, Instructables tutorials show how to sculpt entire figures from polymer clay, such as Sculpey III. Polymer clay is PVC‑based and hardens in a regular oven, which makes it accessible for home use if you follow safety instructions carefully. One guide notes that Sculpey III comes in small two‑ounce blocks at roughly two‑and‑a‑half dollars each, and three blocks are enough for a full figure plus accessories at modest scale.
Because polymer clays pick up dirt and oils easily, the author stresses hand‑washing before handling and avoiding uncured clay on furniture. The translucent Sculpey III used in the example bakes to a pinkish tone similar to pale skin, which can be useful for unpainted bases, although you can always paint the baked figure afterward with acrylics.
Full‑sculpt figures are more demanding than kitbashes; the same guide warns that first attempts will not come close to what you envision. However, it also points to teaching materials such as Patricia Rose’s polymer figure series, where professional sculptors demonstrate techniques that have produced pieces sold for thousands of dollars. Even if your goal is not to sell originals, learning armature building and anatomy in clay will massively improve the way you modify existing PVC or ABS figures.
A simple comparison of sculpting materials helps clarify where epoxy and polymer clay fit in a customizer’s toolkit.
Material | Best use cases | Strengths | Limitations |
|---|
Epoxy sculpt (e.g., Aves Fixit Sculpt) | Armor, add‑on details, durable play parts | Extremely tough when cured, bonds to plastic, sands smoothly | Short working time, heavier than plastic, more expensive per volume |
General epoxy putties (e.g., Aves Apoxie) | Surface reshaping, medium‑duty details | Good detail capture, compatible with hobby acrylics | Slightly less impact‑resistant than Fixit‑grade products |
Polymer clay (e.g., Sculpey III) | Full figures, large accessories, display pieces | Bakes in home oven, comes in many colors, easy to blend | PVC‑based fumes if overheated, less ideal for rough play, must be baked off the figure unless the base tolerates heat |
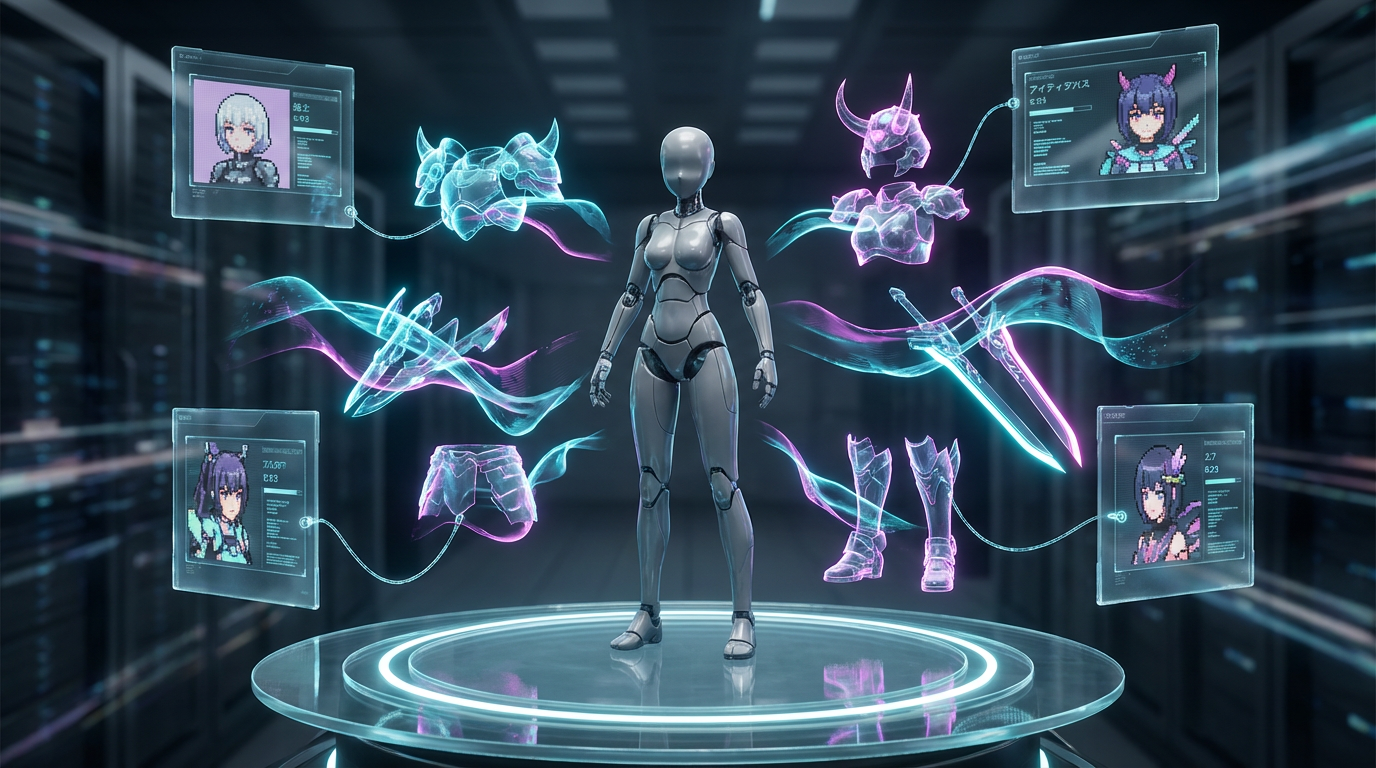
Digital Dreams: 3D Printing, Scanning, and Hybrid Builds
One of the biggest innovations in custom figures has been the spread of consumer 3D printing. Instead of scratch‑building every small accessory by hand, you can print precise parts and then finish them like any other piece of fodder.
Demeng Toy’s guide explicitly calls out 3D printing as a way to design and fabricate your own parts, accessories, or even entire figures. PlasticToyFactory includes it in a standard workflow alongside sculpting and kitbashing: sketch, model or kitbash, test‑fit and assemble, then paint and seal. Personalized action figure services such as My3dSelfie go even further by letting you upload photos or 3D files (for example, OBJ) and then handling the modeling and printing for you. They typically print in materials like nylon for durability and flexibility or full‑color sandstone for a more stone‑like, display‑oriented feel.
In community discussions, you can see how this lands for beginners. A newcomer in a 3D printing group describes wanting to scan the head of an existing figure, modify it digitally, and then resin‑print the ideal head for a custom Donald Pierce from X‑Men. The concern is the learning curve of 3D modeling and scanning, which is very real. The innovative middle ground for many hobbyists is to mix pre‑made or commissioned digital parts with traditional finishing. You might commission a digital artist or use a commercial configurator to get the perfect anime‑style face or hairstyle as an STL file, print it in resin at home or through a service, and then do all the sanding, priming, painting, and sealing yourself.
My3dSelfie underscores an important point: good reference is everything. Clear, well‑lit photos of faces from multiple angles drastically improve likeness in digital sculpting. Before printing, reviewing a 360‑degree preview and checking tiny features such as eyes, eyebrows, and hand poses avoids expensive reprints. Once printed, small heads and hands benefit from the same techniques you would use on any resin kit: careful support removal, sanding, and thin‑layer acrylic painting, followed by sealing.
Packaging, Display, and the Narrative Around Your Custom
Innovative customization does not stop at the figure. The box and the way you display the piece are part of the story.
A packaging guide from Emenac Packaging USA argues that custom action figure packaging is both protection and sales driver. Even if you are not selling, the psychology holds for your own shelf: a strong box makes a custom feel “real.” The guide recommends choosing materials like sturdy cardboard for structure, foam board for cushioning and position control, and clear acrylic panels so that the figure is visible from the front and sometimes the sides. Measuring the figure and its accessories accurately, then leaving a little breathing room in every dimension, prevents scuffed paint and cramped, awkward layouts.
Clear visibility is treated as non‑negotiable. Large front windows with no printed graphics on the plastic itself keep the view unobstructed. The branding, character name, and origin story belong on cardboard frames and backdrops that echo the figure’s theme. For a custom anime villain, that might mean bold contrasts and sharp angular graphics; for a slice‑of‑life character, softer palettes and cozy visual motifs. Emenac’s advice is to avoid boxes that are too tight, which reduce display impact and limit room for accessories, stands, or effect parts.
Display does not end with the box. Customdesignsboxes encourages posing finished customs in dynamic scenes that suggest what problem the character is solving, especially when combined with dioramas. My3dSelfie’s display tips align with this: place figures in good lighting, optionally under glass, add themed props, and check periodically for dust or damage. For anime collectors, that might mean matching character poses to iconic keyframes, using printed backdrops, or combining multiple customs into a single scene, such as a rooftop battle or festival street.
Designing for Playability, Not Just Display
Underneath all the paint and packaging, a toy still has to work as a toy, especially if kids or heavy‑handed adults will handle it.
Academic work on character toys and universal design from Heljakka and collaborators emphasizes playability as more than just articulation count. Toys should be easy to manipulate, perceptible to a wide range of users, and flexible in how they can be played with or displayed. For customs, that translates into practical decisions: avoid adding so much bulk around joints that they freeze; keep edges smooth on newly sculpted parts; ensure accessories are not so tiny that they become choking hazards for children.
Visual balance is another design tool with real impact on how a custom feels. Design education from institutions like Berkeley describes three main types of balance: symmetrical, asymmetrical, and radial. A symmetrical design, where both sides of a figure mirror each other, feels stable and formal. Asymmetrical balance, where different elements still feel visually even, creates dynamism and tension—perfect for action stances or edgy characters. Radial balance, where elements radiate from a central point, is powerful for halo effects, magical auras, or mecha energy bursts behind a character. When you place armor plates, hair trails, or effect parts, you are unconsciously choosing one of these balances; being aware of that choice lets you push the mood intentionally.
Toy design experimentation, such as ArtCenter College of Design’s collaboration with Mattel on the future of Hot Wheels, suggests another frontier: blending digital and physical play. In that studio, students explored destination spaces and tech‑augmented cars that remain undeniably physical but gain digital overlays. Customizers can mirror this on a small scale by, for example, building interchangeable armor sets for a single anime base body, or creating physical variants that match digital skins from games or fan art.
The underlying principle from Hot Wheels designers—use technology to enhance tangible play, not replace it—fits anime figure customs perfectly.
Community, Business, and the Long Game
Once you start customizing, you inevitably intersect with community. Demeng Toy encourages sharing photos of customs against backgrounds that match the character’s world and even creating video tutorials. Customdesignsboxes suggests using social platforms to build an audience and draw feedback. PlasticToyFactory points to established communities and independent artists, as well as professional manufacturers such as Happy Worker, who combine sculpting, 3D printing, detailed painting, and custom packaging into high‑value collectibles.
If you ever consider turning your hobby into a side hustle, those examples matter. PlasticToyFactory highlights the role of online configurators that let customers choose options, while Emenac emphasizes packaging that looks on‑brand and collector‑friendly. My3dSelfie shows another model entirely, where the business handles technical 3D work while the customer focuses on choosing reference and options. Patricia Rose’s polymer figures, cited in Instructables tutorials as commanding high prices, are a reminder that deep craft in sculpting and finishing can sustain professional careers.
Even if you never sell, leaning into this longer horizon—tracking what materials actually survive handling over years, refining your painting technique across dozens of customs, organizing fodder and references properly—will make each new project better than the last.
FAQ: Quick Answers for Aspiring Customizers
Do I really need primer if I am just repainting a stock figure? Primers are strongly recommended once you are past quick touch‑ups. Community advice from Rebelscum and guides like Jin Saotome’s show that primer unifies the surface, reveals flaws, and helps paint adhere, especially on areas you have sanded or reshaped. On untouched sections of factory plastic, some customizers paint directly, but even there a thin, plastic‑safe primer layer greatly reduces chipping and rub.
Is acetone safe to use on figures? Acetone is very effective at stripping paint, as the ActoyDesign guide explains, but it is powerful enough to soften or melt some plastics and is dangerous for eyes and mucous membranes. Use it sparingly, with goggles and good airflow, applied via cotton swabs or paper towels rather than soaking the entire figure. Always test on a hidden area first, and skip acetone entirely on softer vinyl or rubber where it is more likely to cause damage.
Can kids play with customized figures, or are they only for display? Many customizers treat their work as display‑only, but Technodrome discussions about making a Lord Dregg custom for a child show that play‑durable customs are possible with the right materials. Using tough epoxies such as Aves Fixit Sculpt at sensible thickness, sanding edges smooth, painting with quality hobby acrylics, and sealing with durable clear coats like Vallejo’s semigloss resin can produce figures that stand up well to normal play. You still need to avoid sharp points, tiny loose accessories, and any flaking finishes for safety.
Do I need professional 3D skills to use 3D printing in my customs? Not necessarily. Beginners in 3D printing groups often start by scanning existing heads or using pre‑made or commissioned digital files, then focusing their effort on printing, sanding, and painting. Services like My3dSelfie show that you can even skip modeling entirely by supplying photos and letting them handle the technical side. Over time, many hobbyists learn basic mesh editing or sculpting, but it is not required on day one.
In the end, customizing figures and toys is about taking the characters you love and giving them the treatment you feel they deserve, with the best techniques you can access. Whether you are repainting a prize figure’s eyes so they finally match the key art, sculpting new armor for a favorite mech pilot, or 3D‑printing an entirely original idol from your own design, you are participating in the same culture that professional toy designers, fan customizers, and academic researchers are all exploring from different angles. Keep learning, keep experimenting, and let your shelf become a living story of your fandom and your craft.
References
- https://guides.lib.berkeley.edu/design
- https://www.academia.edu/38605351/Toys_and_Universal_Guidelines_for_Design_A_Designerly_Perspective_on_Playability_of_Character_Toys
- https://www.nfi.edu/character-design/
- https://www.artcenter.edu/connect/dot-magazine/articles/lets-play-toy-design-for-a-new-generation.html
- https://admisiones.unicah.edu/browse/nLvHOb/8OK151/HowToDrawActionFigures.pdf
- https://stanleymuseum.uiowa.edu/sites/stanleymuseum.uiowa.edu/files/2022-04/STEAM_Klee_FINAL.pdf
- https://minds.wisconsin.edu/bitstream/handle/1793/83700/2022sanderss.pdf?sequence=1&isAllowed=y
- https://www.demengtoy.com/a-revamp-your-action-figures-a-guide-to-spectacular-customization-techniques.html
- https://forums.thetechnodrome.com/showthread.php?t=40631
- https://customdesignsboxes.com/blog/how-to-add-features-for-action-figure-customization?srsltid=AfmBOopXJ43MpNznaArdvHdchFblANUDyhAQ8M-U2p97KURyiQK9jN12