Identifying the Focal Point in Your Figurine Display
Learn how to choose, position, and light a clear focal figure so your collection looks curated, readable, and photo-ready.
A strong focal point is the figure or zone your eye lands on first, the one that makes your whole display feel intentional instead of "a bunch of stuff on a shelf." Nail that, and even a modest lineup of prize figures can hit like a tiny museum wall.
You know that moment when you finally unbox a grail, park it on a shelf... and somehow it disappears into the crowd? The poses are cool, the sculpts are gorgeous, but when you glance over, your eyes just ping-pong around with nowhere to rest. Once you start treating your setup like a piece of art and build one clear focal point into each zone, your shelves suddenly photograph better, guests know exactly where to gasp first, and your own favorite characters feel properly celebrated. This breakdown walks through how to pick the right "star," where to put it, and how to use lighting, contrast, and supporting figures so any case, bookshelf, or wall display has a magnetic focal point.
What a Focal Point Is (And Why Your Figures Deserve One)
Art composition resources describe a focal point as the key point of interest you want viewers to see first, the part that tells them what the piece is really about and why it exists at all, and they emphasize picking that spot deliberately rather than trying to show everything equally at once focal point in art. Painting instructors warn that when every area has equal detail and contrast, nothing stands out and the viewer's eye never finds a resting place, which makes the whole work feel scattered and tiring instead of satisfying to look at focal point in watercolor. Figure displays fall into the exact same trap when every character is lit, posed, and placed with the same visual weight.
Instead of thinking "I want to show all my figures," it helps to think "What story should this shelf tell first?" Art teachers often recommend one clear primary focal area supported by smaller secondary points that keep your eye moving but never compete with the main focus. Translating that to collectibles, each visual zone in your room — a detolf shelf, a wall case, a console-table vignette — works best when there is one obvious headliner surrounded by a supporting cast that reinforces that character or theme.
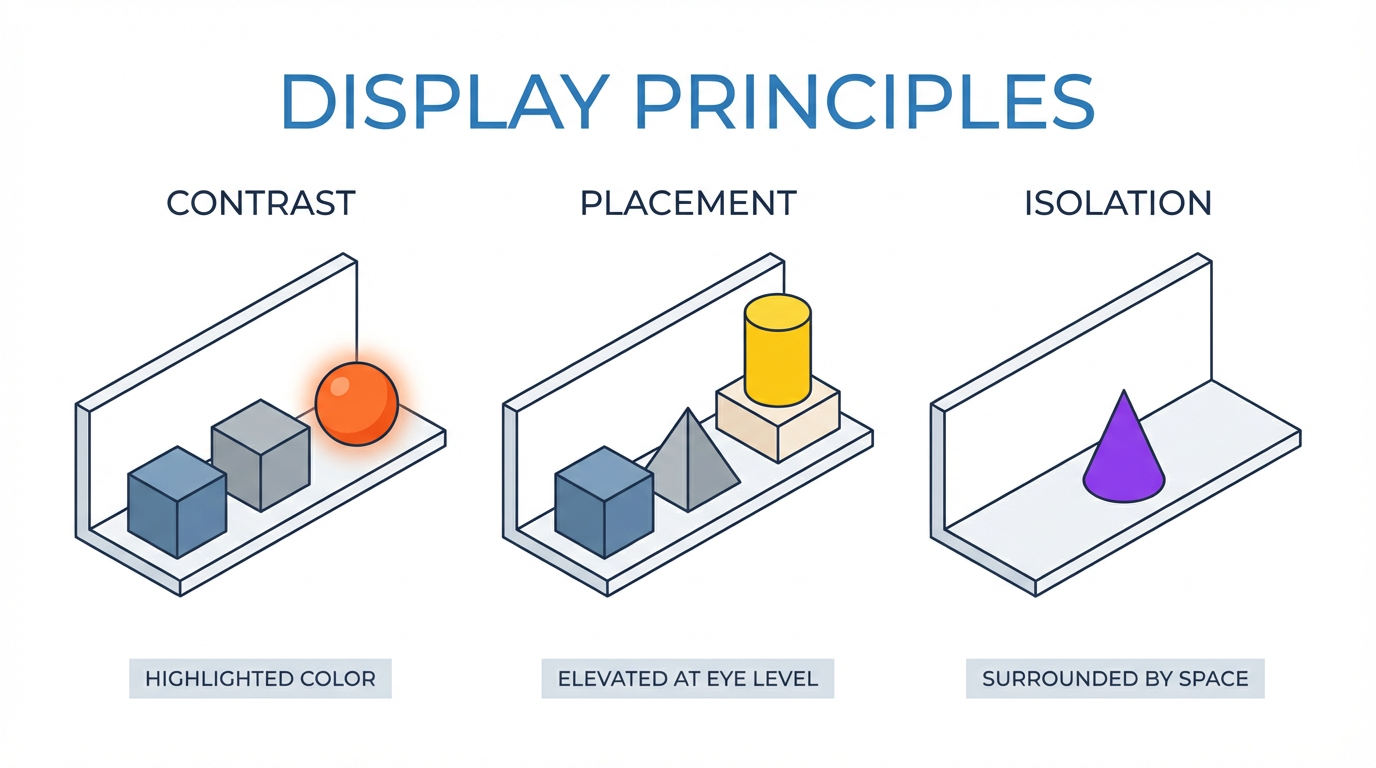
A quick way to test your current setup is to snap a phone photo, glance away, then glance back for just a second and notice where your eyes land first. If your answer is "everywhere at once," you do not have a focal point yet; if your answer is a specific figure or cluster, you already have one, even if it is unintentional. The good news is that the same tools painters use to steer attention — contrast, placement, and isolation — work beautifully on shelves full of PVC.
Choosing the Star of the Shelf
The first big decision is which character or piece actually deserves focal status. Collectible display specialists recommend building a focal area around items that are emotionally significant, visually striking, or especially rare, rather than treating everything as equal, because that is what turns a collection into a story instead of a warehouse of stuff. Think about your display in terms of "headliners" and "supporting cast," the way a good concert lineup works.
One approach is to lead with meaning. Maybe your focal point is the first figure you ever bought, the grail you hunted for years, or the character that basically built your fandom identity. Another approach is to lead with visual impact: the most dynamic pose, the most saturated color palette, the wildest base. Interior decor writers describing figurines and sculptures as "miniature works of art" point out that larger or more expressive pieces naturally work as anchors while smaller ones shine as accents that support a theme from the edges decorative figurines at home. Either way, the focal choice should feel like a deliberate promotion, not an accident.
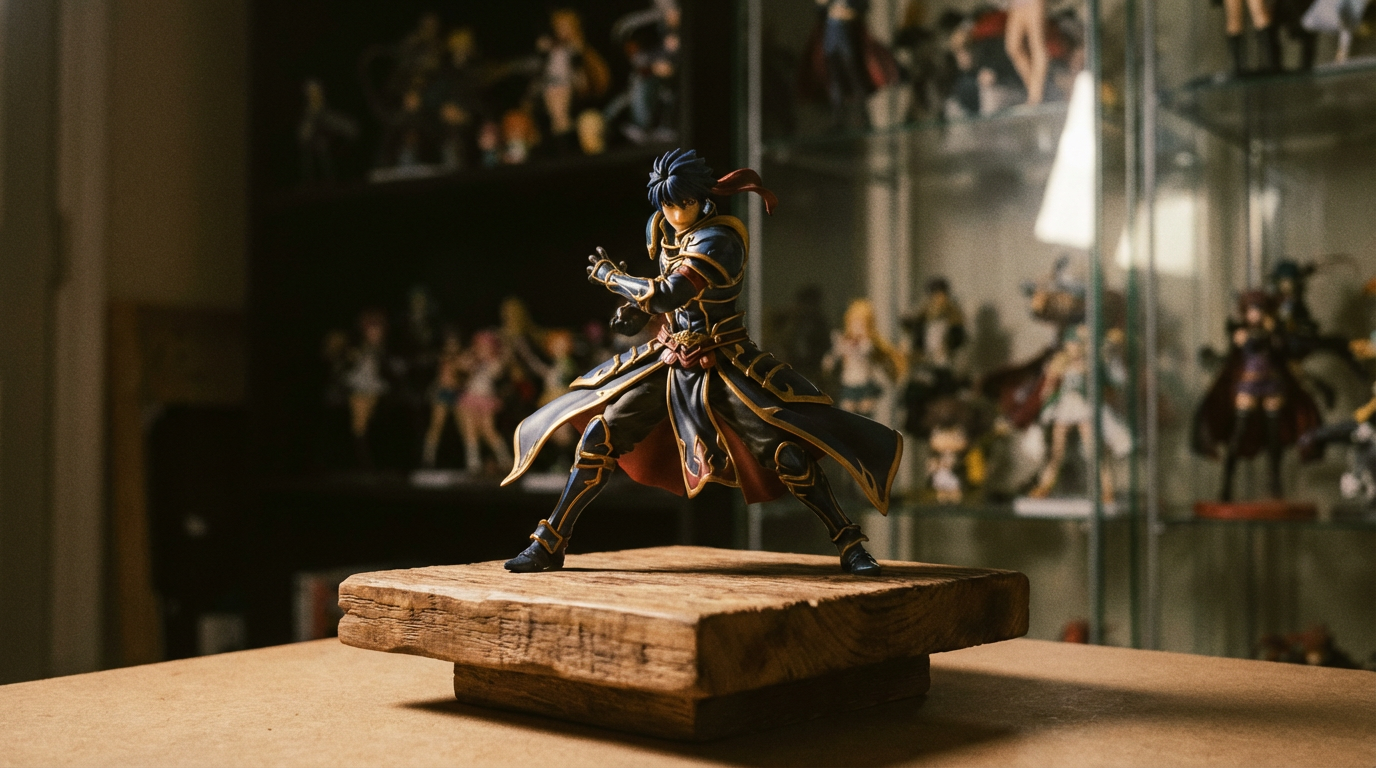
There is also the question of scale. Proportion guidelines for figurines and sculptures suggest using larger pieces as focal anchors in spacious spots and reserving small, intricate pieces for closer surfaces like side tables and narrower shelves, so they do not get visually swallowed by empty space incorporating decorative figurines. The upside of picking your biggest or boldest figure as the focal point is instant readability; the downside is that it can easily overpower everything else if you do not consciously dial back the surrounding pieces.
One Focal Point Per Zone, Not Per Room
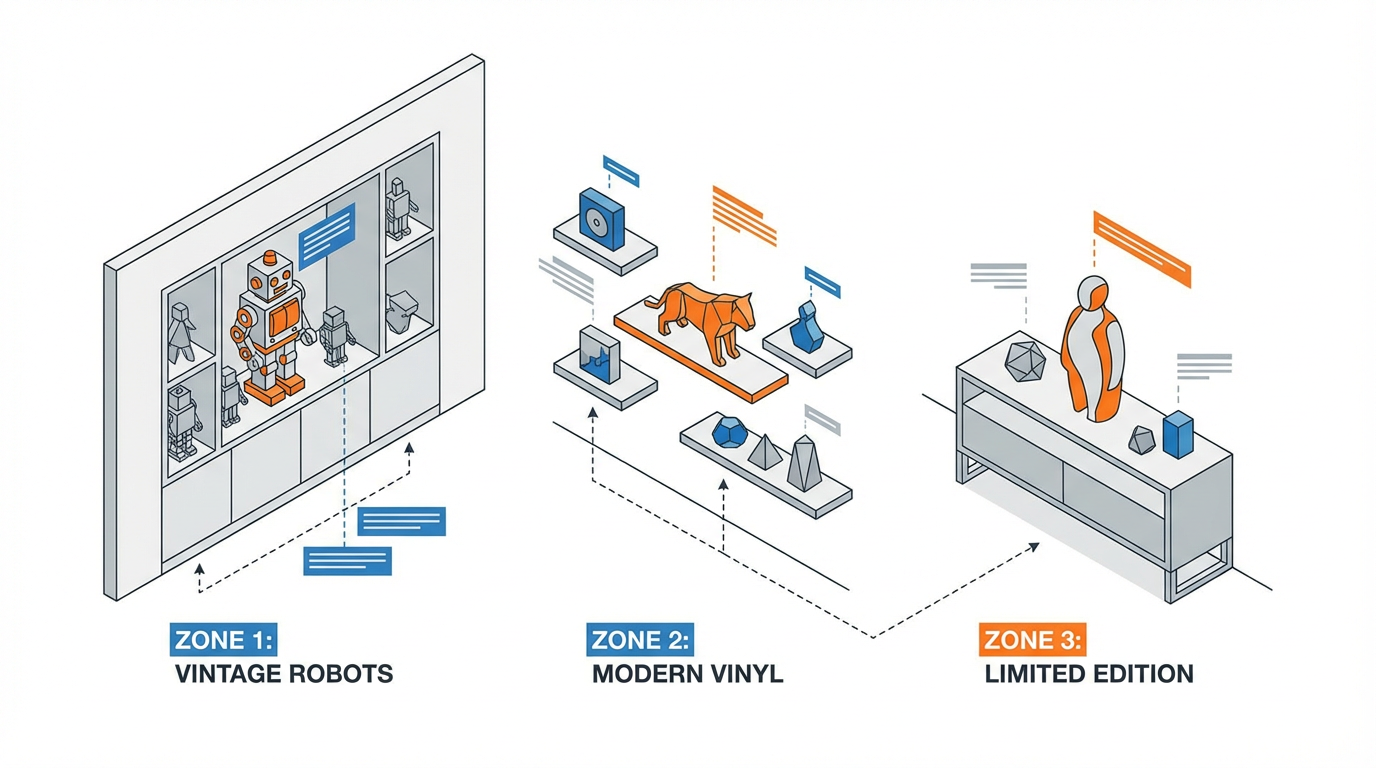
Art instructors often recommend a single primary focal point with any secondary points clearly subordinate to it, because multiple main focal areas fight for attention and weaken the composition. For a collection, it helps to think in "zones." A room can have several zones — for example, a wall cabinet, a floating-shelf cluster, and a coffee-table diorama — and each of those zones can host its own star without the room feeling chaotic.
The practical move is to give each detolf shelf, cabinet section, or shelf cluster one obvious hero and then let nearby figures either echo that character's story or gently fade into "support mode." The advantage is that you can still display a lot of pieces while keeping each area readable; the tradeoff is that some favorites will have to step down from the spotlight into supporting roles or rotate in over time.
It is a little ruthless, but your future photos and your daily eye candy both benefit.
Placement: Where the Focal Point Belongs
Once you know who the star is, the next question is where that star should physically live. Sculpture-display guides consistently recommend eye-level placement for key pieces, because that is where viewers can appreciate details without straining or leaning, and they caution against putting important works where people will constantly bump into them or walk awkwardly around them. For figures, that usually means your focal point belongs roughly at your standing eye line when you first enter the room or sit in your usual viewing spot, not crammed down near the floor or way above your head.
Pedestals, risers, and adjusted shelf heights all exist to help with this. Professional sculpture displays often use a pedestal to elevate the piece closer to eye level and separate it from surrounding furniture so it reads as special rather than as just another object in the room. A similar effect happens when you place your focal figure on the second shelf of a cabinet instead of the bottom one, or give it a slightly taller riser so it looks back at you instead of up at you.
Rule of Thirds for Shelves and Walls
Painting teachers frequently recommend placing focal points near the intersections of an imagined three-by-three grid rather than dead center, because viewers naturally find those slightly off-center spots more dynamic and pleasing creating a focal point in your art. This "rule of thirds" is easy to apply to a shelf or wall case as well: mentally divide the width and height of your display area into thirds and aim to position your focal figure near one of those intersection points instead of exactly in the middle.
The benefit of this approach is that your display feels intentional and cinematic, like a well-composed anime frame, instead of like a yearbook photo. The downside is that you may need to resist the very strong instinct to center your favorite character perfectly. A neat trick is to shift the focal figure just a little left or right of center and then use a smaller supporting figure or prop on the opposite side to balance the weight, which mirrors how painters add secondary interest without stealing the show.
Matching Display Type to Focal Strategy
Different display structures make focal points easier or harder to read. Wall-mounted action figure cases, for example, are often designed to turn an entire collection into the room's main visual highlight, especially when they use UV-protected clear fronts, adjustable shelves, and lighting that makes the figures feel like a gallery wall of nostalgia action figure wall display. Floating shelves can create a similar effect on a smaller scale; home-design writers describe how a simple row of well-placed shelves can become a strong focal point for antiques or collectibles when the arrangement is tightly edited and thoughtfully lit.
A quick way to compare approaches is to think in terms of where the focal figure sits and what could go wrong.
Display type | Strong focal placement | Watch out for |
|---|
Glass or acrylic cabinet | Hero at eye level, a little off-center, on a riser or distinct base | Overfilling shelves so the focal piece reads as "one more face in the crowd" |
Wall case or floating shelves | Hero in the middle row, third-in from one side, with clean space around | Mounting too high or low, making viewers crane or ignore the whole cluster |
Tabletop or console vignette | Hero centered front-to-back, offset sideways, flanked by smaller accents | Letting everyday clutter creep in and compete with the figure |
Tabletop setups benefit from the same pedestal logic as sculptures: if the focal figure lives on a console table or coffee table, place it where someone naturally stands or sits, then build a softer halo of supporting decor around it. Interior styling articles often show figurines paired with plants, books, or candles to create small "scenes," which works beautifully as long as those props are clearly supporting elements and not accidentally brighter or larger than your focal piece.
Making the Focal Point Pop With Contrast and Light
Once your hero is in the right place, you strengthen the focal point with contrast. Art composition lessons describe contrast as any noticeable difference that makes a part of the image stand out — color, light versus dark, shape, texture, or form — and they explain that combining several types of contrast makes the focal point even stronger 5 ways to create a focal point. For figures, that might mean a bright, saturated character in a lineup of neutrals, a dynamic flying pose among stoic museum poses, or a highly detailed base surrounded by simpler stands.
Color is the easiest lever to pull. One small area of intense or complementary color in a mostly subdued setting has an outsized pull on the eye; art examples like a splash of red against greens or a bright yellow against deep blue show how powerful that can be. On a figure shelf, that might be a fiery shonen protagonist in warm reds and oranges surrounded by cooler, darker characters whose colors you deliberately keep a bit further back or in shadow. The advantage is instant focus; the risk is visual shouting if you scatter equally bright neons all over the display.
Isolation is another strong device. Art teachers note that separating one object from the group or leaving more empty space around it immediately draws the eye there first. Instead of filling an entire shelf edge-to-edge, give your focal figure a bit of breathing room while clustering supporting characters more tightly together elsewhere. Collectors sometimes resist this because it feels like "wasting" space, but that empty air is doing real compositional work.
Light It Like a Tiny Stage
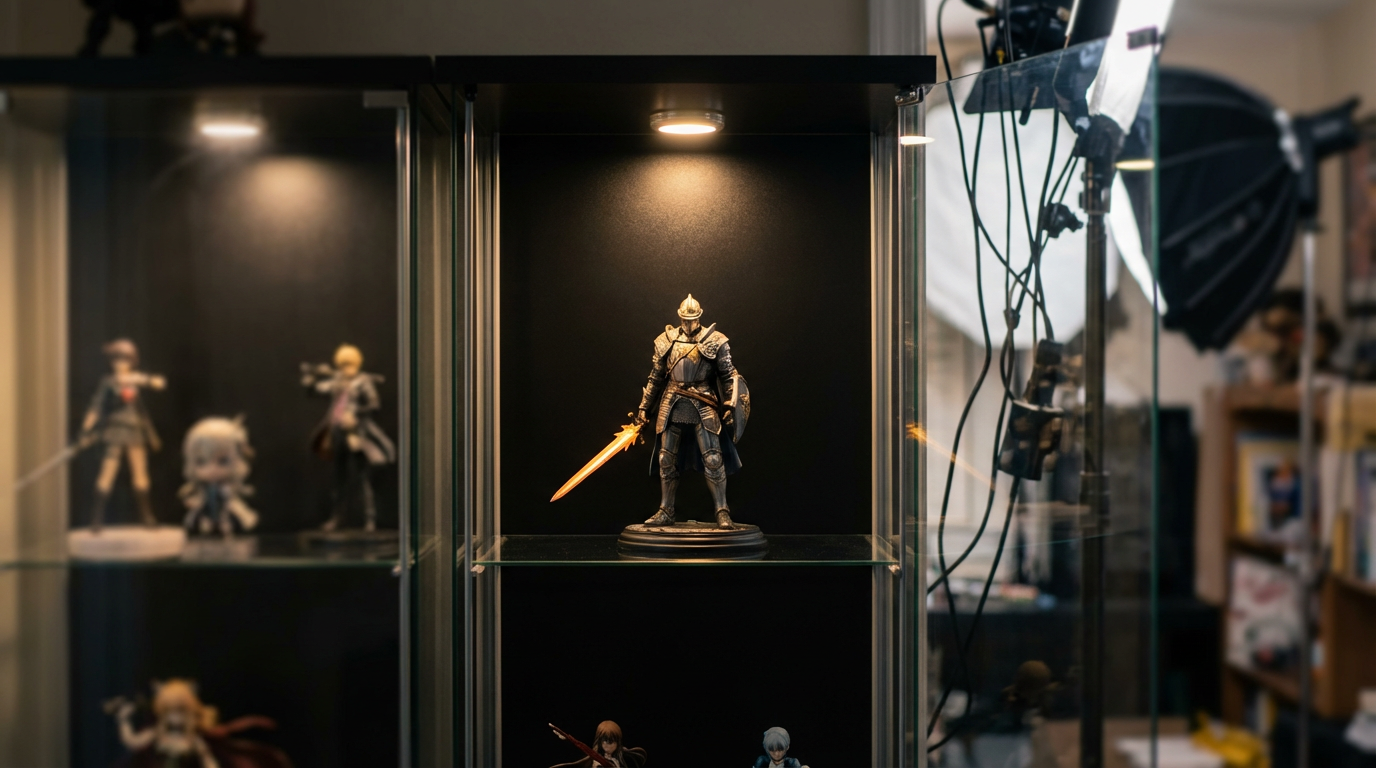
Lighting is where the display magic really happens. Collectibles and decor guides repeatedly highlight lighting as a key design tool, especially recommending low-heat LED strips, pucks, or spotlights to enhance color and detail without risking heat damage. Wall-mounted and cabinet-style action figure displays in particular are often designed with built-in or add-on LED lighting precisely because it makes the figures read like a gallery or retail feature wall in the room.
Art and sculpture lighting advice also warns against harsh single spotlights or lighting from directly below, which can create unflattering shadows or a "horror movie" look, and instead favors bright but diffused illumination that reveals detail without washing it out. A practical tactic is to treat your room light as the "ambient wash," add soft under-shelf LEDs across the whole shelf, and then give your focal figure a slightly stronger or warmer accent so it steps forward without glaring. Figure-display guides that dig into mood lighting suggest warm tones like red, orange, and yellow for cozy or action-heavy scenes, and cool tones like blue, green, or purple for calm or mysterious setups, with complementary color combinations making the focal figure pop even more against its background.
Depth, Risers, and Negative Space
Depth is the third pillar that reinforces a focal point. Collectible-display experts often recommend varying height and depth using risers, stands, and layering so larger pieces sit at the back and smaller ones in front, with the focal piece placed where it can be seen clearly without being blocked. The goal is to build a little stage set in three dimensions so your focal figure feels physically forward compared with the rest, which subtly matches how our eyes prioritize nearer objects.
At the same time, you can use negative space behind and around the focal area to keep it dominant. Watercolor and painting resources mention sharpening edges and using a full range of light and dark values at the focal point while softening or simplifying less important areas, because if everything is rendered with equal intensity, nothing stands out focal point in watercolor. In display terms, that might mean giving your focal figure a clean, darker backing panel while letting the rest of the shelf get softer, more diffused light, less busy bases, or fewer props.
Keeping the Rest of the Collection From Fighting Your Focal Point
Even the strongest focal figure can get drowned if the whole collection crowds it. Home-decor writers who specialize in collections draw a clear line between a curated display and clutter: they suggest editing down to a selected group of favorites, rotating pieces regularly, and keeping spacing tidy so each item looks intentional rather than like a pile of stuff display a collection without clutter. For figurines, that often means accepting that not every figure lives on the "A-shelf" at the same time.
One strategy is seasonal or thematic rotation. Exhibition design frameworks talk about thematic displays as immersive environments built around a clear narrative, using consistent colors, graphics, and props to deepen emotional impact three display techniques. Applying that at home, you might dedicate one zone to a specific arc, team, or mood for a few months, give those characters the focal spotlight, and store or relocate others to quieter spots until their turn. The upside is endless freshness and focus; the downside is the need for decent storage and the emotional challenge of taking favorites offstage for a while.
Another strategy is to treat small figurines and decor pieces as supporting storytellers rather than co-stars. Decor articles about animal, mythical, and spiritual figurines talk about using them to build little narrative scenes — a cluster of animals in a nature-themed vignette, a dragon anchoring a fantasy section, a Buddha figure calming a meditation corner — where the main piece is clearly the "lead" and the others reinforce that feeling. Your anime shelves can work the same way: let one big or emotionally important character rule the focal area, then place chibi versions, props, or side characters around them in a way that supports their story.
The pros of this curated approach are clarity, easier cleaning, and a display that impresses even non-collectors. The cons are all psychological: some figures will live in boxes or secondary locations, and you may have to break up sets that only work visually when edited. Over time, though, that discipline tends to make your collection feel more like a rotating gallery of favorites and less like a storage problem with glass doors.
FAQ: Quick Focal Point Fixes for Collectors
Does every shelf need its own focal point, or just one per room?
Think in zones rather than strict rules. Most art-composition advice recommends one primary focal point per composition, with any secondary focal areas clearly subordinate. In a collection room, each visually distinct zone — one cabinet, one wall of floating shelves, one console table — acts like its own composition. Giving each zone a main star usually feels better than trying to crown only one figure for an entire room, as long as those zones are separated enough that your eye reads them one at a time.
Can a tiny nendoroid or prize figure really be the focal point?
Absolutely. Art teachers emphasize that contrast, placement, and isolation create focal points, not sheer size. A small figure placed at eye level, slightly off-center, with a bit of breathing room, a stronger color contrast, and a gentle spotlight can outshine bigger statues around it. The tradeoff is that larger pieces near it must be visually quieter — simpler poses, darker colors, softer lighting — so that the little one can command attention.
A good next step is to stand in the doorway of your collection room, look at your main setup, and ask yourself one question: "Which character is clearly the star here?" If the honest answer is "all of them" or "none of them," that is your cue to reshuffle heights, light, and spacing until one figure finally steps forward. When that happens, your whole display stops being background decor and starts feeling like a story you get to walk past every day.