Transform Your Collection Room into a Museum with LED Strip Lights
LED strip lights can turn a cluttered figure room into a gallery-style museum by using controlled color, even brightness, and smart placement.
You spent years hunting down that grail scale figure, but on the shelf it disappears into yellowish gloom, harsh shadows, and a tangle of wires. Modern LED strips use far less energy than old bulbs and can last tens of thousands of hours, so you can keep your display glowing every evening without roasting the room or blowing up the power bill. This guide walks through how to choose, place, and power LED strip lights so your collection room feels like a curated museum, not a dark storage closet.
What “Museum Lighting” Really Means for a Figure Room
When museums light paintings and sculptures, they focus on three simple things: accurate color, even illumination, and gentle light that does not damage the art. Lighting experts for galleries and displays increasingly use LEDs because they render colors faithfully, cut energy use, last much longer than older lamps, and generate less heat and UV/IR than many traditional options, which helps protect delicate surfaces over time. In a figure room, those “delicate surfaces” are your painted PVC, metallic finishes, and translucent effect parts.
Researchers at University of Florida Extension note that lighting can account for around 15 percent of home energy use, more than a refrigerator, dishwasher, and clothes washer combined, which is why efficient LEDs are such a big win. At the same time, display-lighting specialists emphasize high color rendering index, or CRI, so colors look like they should instead of washed out or sickly. For a collection room that aims for a museum vibe, that means white LED strips with a CRI of at least 80, and closer to 90 when you really want vibrant reds, subtle skin tones, and clean whites on your figures and box art.
Uniform light is the other secret. Museums work hard to avoid hot spots and dark patches, spacing fixtures so visitors see the art, not the light source. You can borrow that by lining shelves and cabinets with continuous LED strips, using diffusers or channels to smooth out the dots. The goal is not to blast everything with raw brightness, but to create a calm glow where every Nendoroid face and every mecha panel line is clearly visible.

Choose LED Strips That Make Figures Look Like Art
The first big decision is picking strips that match the mood of your room and the style of your collection. Home-decor and display guides consistently point to three specs that matter most: color temperature, CRI, and brightness with dimming.
Color temperature and mood
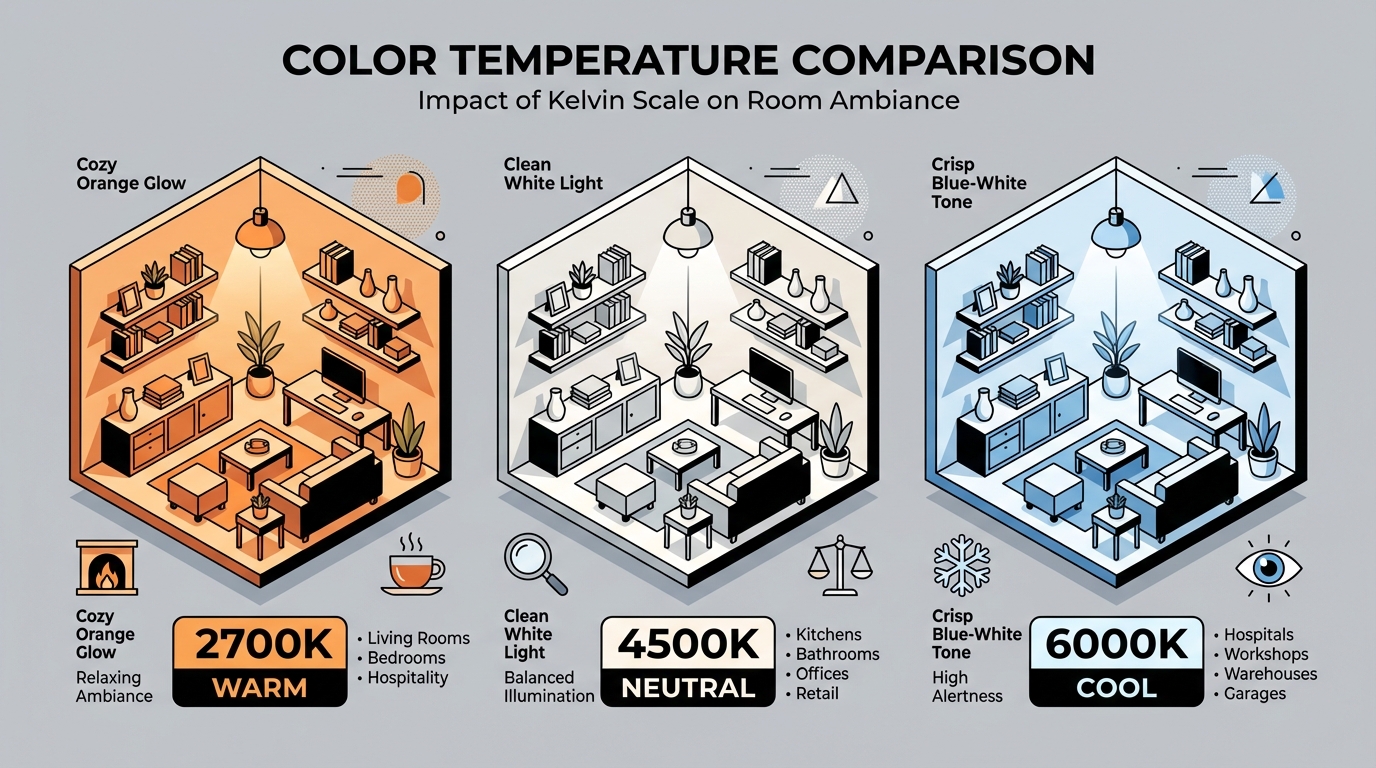
Color temperature, measured in kelvins, is the “warmth” or “coolness” of the white light. Multiple lighting resources recommend warm white around 2,700–3,000 K for cozy rooms and cool white around 4,000–5,000 K for bright, modern spaces. Retail shelf specialists also highlight very cool whites around 6,000 K or more for a crisp, futuristic look.
Here is a simple way to think about it for anime displays:
Color temperature | Visual feel | Great for |
|---|
2,700–3,000 K | Warm, cozy, sunset-living-room glow | Slice-of-life, romance, cozy bedroom corners |
4,000–5,000 K | Neutral, clean, gallery style | Mixed collections, boxed displays, art prints |
6,000 K and up | Cool, high-energy, techy | Mecha, cyberpunk, gaming zones |
Many LED-strip installation guides warn that mixing different white tones in one room is one of the fastest ways to ruin a design because it makes everything feel mismatched and cheap. If you want a museum vibe, pick one main color temperature for the entire collection zone and stick with it so your shelves, ceiling strips, and lamps all speak the same visual language.
RGB strips absolutely have their place, especially for “event modes” during streams, parties, or late-night anime marathons. Just treat them as an overlay: give yourself a baseline of good-quality white lighting first, then use color-capable strips for accents or scenes you can toggle on and off.
Color rendering (CRI) and why it matters for PVC paint
CRI describes how accurately a light source reveals colors compared to a reference light. Gallery and museum guidance suggests aiming for 80 or higher, with premium display setups using strips at 90 or above so artwork appears as intended. Retail shelf experts echo this, recommending high-CRI strips for clothing, food, and cosmetics so products look honest and appealing.
Figures are no different. High-CRI LEDs keep pale skin from going gray, deep reds from turning brown, and dark blues from collapsing into sludge. When you shop, look for LED strip specifications that list CRI; many decorative strip-light articles specifically suggest CRI above 80 for home decor and art, and CRI 90-plus when color fidelity matters most. That is exactly the range you want if your collection includes pastel idols, detailed garage kits, or any figure where subtle shading is the whole point.
Brightness and dimming
A classic mistake in LED strip projects is choosing strips that are not bright enough. You can always dim an LED strip, but you cannot make it brighter than its maximum. For a museum-style room, that means buying strips with a bit more output than you think you need, then pairing them with dimmers or smart controls.
Guides on room and display lighting stress layering and control: use dimmable strips so you can set different scenes for daily life, focused photography, or streaming. Smart strips go further by letting you store presets such as a calm warm scene for reading manga and a cooler, brighter scene for model building, all controlled from an app or voice assistant.
Plan a Gallery-Style Layout Around Your Shelves
Once you know what kind of light you want, the magic comes from where you put it. LED strips are flexible and thin, and decor experts love them precisely because they can hug cabinets, ceilings, and shelves without taking over the room.
A common recommendation across home and retail lighting guides is to mount strips where you cannot see the LEDs themselves, but you can see the glow. In a figure room that might mean tucking strips under each shelf, along the front lip but facing back, so the light washes across your figures without glaring in your eyes. Retail display articles suggest under-shelf lighting for consistent downward light, plus side-panel strips to push light toward the back of shelves and add depth; that same approach makes a wall of prize figures look like a store showcase.
For glass cabinets and Detolf-style cases, you can run strips vertically along the front frame, hidden behind the metal or wood, or mount them on aluminum channels up the sides with frosted diffusers. Display-lighting experts recommend diffusers because they straighten runs, soften the “dotty” look of bare LEDs, and improve heat management. Backlighting is another powerful trick borrowed from mirror-lighting and bedroom-aesthetic guides: place strips behind the cabinet, or behind a large wall scroll, so the room gets a subtle halo and your shelves feel like they are floating.
Do not forget the rest of the room. Home-decor LED articles describe using strips in crown molding to create floating ceilings, along baseboards to trace the room’s outline, and behind TVs or monitors as bias lighting to reduce eye strain. In a collection room, that can mean a soft strip behind your anime Blu-ray shelf, a glow under the desk where your gaming PC lives, or illuminated stair risers if your display space is in a loft or basement.
Install Cleanly and Safely So Your “Museum” Lasts
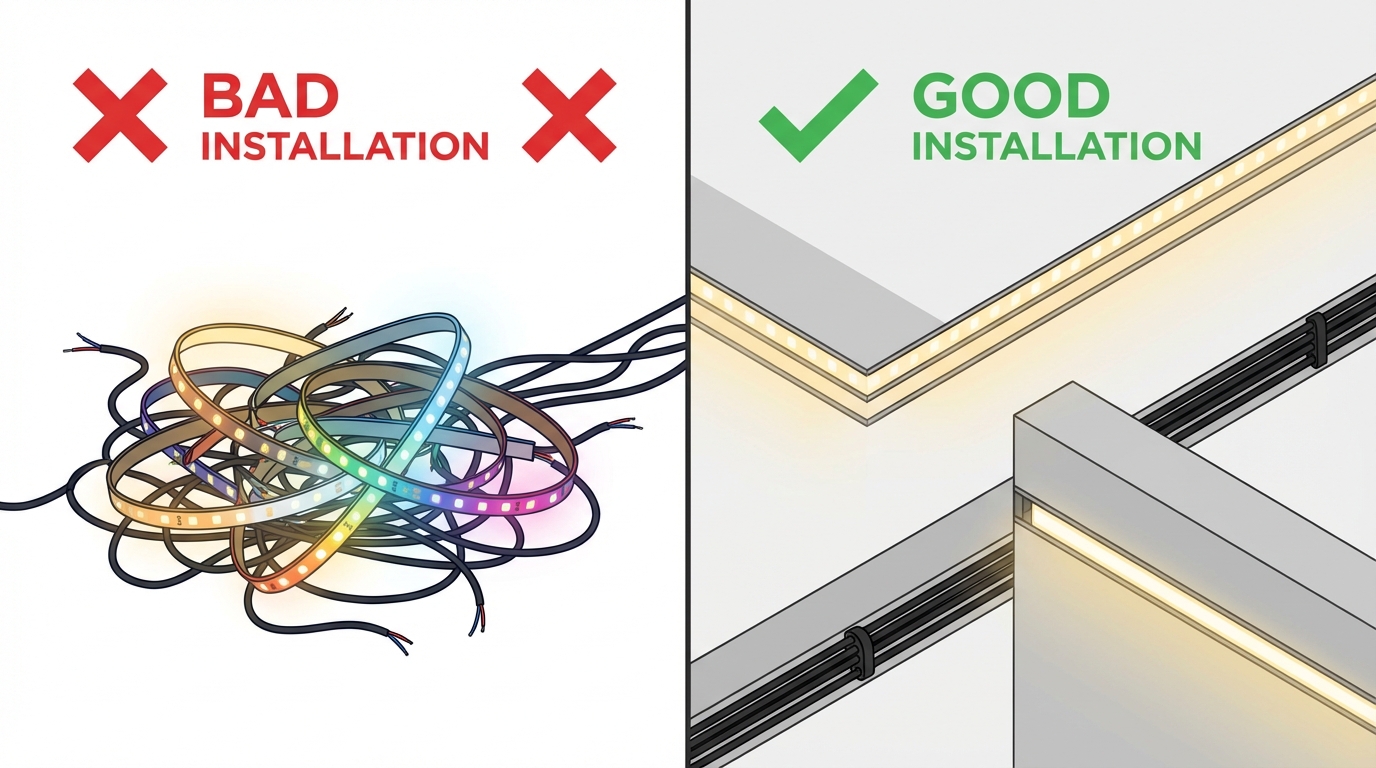
The difference between “museum” and “taped LED chaos” is all in the install. Multiple installation guides, including those from strip-light manufacturers, repeat the same core steps: test, prep, mount, then tidy.
Before you stick anything down, plug in the strips on the floor and test them. Make sure they light up, cycle through any colors or modes correctly, and that the length really fits your planned path. Many homeowner-focused guides recommend this simple test so you do not discover a dead section after everything is already on the wall.
Surface prep is huge. Both general strip-installation references and specific brand tips advise cleaning shelves and walls with a dry cloth or rubbing alcohol so dust, oil, and residue do not sabotage the adhesive. Standard adhesive backing does fine on smooth painted walls, sealed wood, metal, and tile, but can struggle on rough stone, unfinished wood, or upside-down surfaces like the underside of a cabinet. For those, mounting articles suggest stepping up to heavy-duty foam tape rated for demanding environments, or even mechanical mounting straps screwed into solid wood when the strip absolutely must stay put.
When you start mounting, peel the adhesive backing slowly, pressing the strip down a few inches at a time. Installation guides warn against twisting or bending strips sharply around corners, since that can break internal wiring and cause failures; instead, use clip-on corner connectors where the manufacturer provides them, or plan your run so the strip stops before a tight bend and restarts on the next surface. Cutting should only ever happen at the clearly marked cut points, usually visible as copper pads; shelf-lighting tutorials show that cutting on those marks preserves electrical integrity and allows you to solder or clip connectors cleanly.
Channels and diffusers are worth considering for a permanent collection room. Several installation guides explain that aluminum channels not only make lines straight and professional-looking, they also help manage heat for brighter strips and protect them from accidental knocks when you reach in to dust or move figures.
Power, drivers, and simple sizing for a collector wall
Choosing the right power supply is where the “data” side really matters. Supplier tutorials on shelf lighting use a straightforward formula: watts equal volts times amps, and you size the power supply by multiplying the strip’s wattage per unit length by the total length, then adding some headroom.
One example given for 12-volt flexible strips is about 7.2 watts per meter (about 2.2 watts per foot). At roughly 4 meters (about 13 feet) of shelving, that comes to about 28.8 watts of load. The guide then recommends using a 12-volt power supply rated around 36 watts, which gives comfortable overhead so the driver is not constantly running at its limit. The same references note that many 12-volt strips are limited to about 16.5 feet on a single run before voltage drop becomes a problem, so longer displays should be split into multiple runs powered directly from the supply rather than daisy-chained endlessly from one end.
Multiple brands stress that an undersized driver can lead to dim, unreliable strips, while a mismatched or poorly chosen supply can even damage the system. For plug-in setups, a simple wall adapter with enough wattage is usually fine. For hardwired, permanent installs into the room’s electrical system, homeowner guides strongly recommend using hardwire-compatible strips, proper low-voltage drivers, turning off power at the panel, and hiring an electrician if you are not confident with mains wiring.
Cable management is the last step that sells the museum illusion. Installation articles suggest adhesive cable clips, small trunking along baseboards, and routing wires behind furniture so visitors notice the figures, not a jungle of cords. In a figure room, that can mean running wires down the back corner of a cabinet, tucking a driver behind a bookcase, and labeling connections so future upgrades are easy.
Common LED Strip Mistakes That Ruin a Collection Room
Lighting specialists who see thousands of installs every year point out the same handful of mistakes that instantly cheapen a setup, and they are especially noticeable in a collector’s room.
The first is choosing the wrong strip for the job. Guides from strip-light companies emphasize that you should define the function before you buy: accent versus main light, visible versus hidden, and whether you want simple white, tunable white, or full color. A dim decorative strip that was meant for mood lighting will disappoint if you expect it to be the only light source for a full wall of figures. On the flip side, using extremely bright, cool strips where you wanted a relaxing chill corner can make the room feel like a warehouse.
The second is color chaos. Multiple sources warn that mixing color temperatures or randomly throwing in RGB effects is one of the fastest ways to ruin an otherwise good design. When half your room is warm white and the other half is cool blue-white, your figures take on different skin tones from shelf to shelf, and your eye never settles. Treat RGB like a special effect and keep your everyday white lighting consistent.
The third is sloppy physical installation. Lighting articles show the same telltale issues: drooping runs where adhesive failed, visible bare strips where the plan was to hide them, twisted loops jammed around corners, and wires dangling in front of displays. These are usually solved by slowing down, prepping surfaces properly, using better tape or channels when needed, and planning accessories like connectors, dimmers, and controllers as part of one system instead of as random add-ons.
Finally, many collectors underestimate accessories and controls. Manufacturer guidance repeatedly recommends thinking in systems: strips plus appropriately rated drivers, plus dimmers, switches, connectors, and maybe smart controls if you want scenes and scheduling. When all of that is planned together, the result feels like a coherent museum exhibit, not a bundle of impulse-buy light kits.
FAQ: LED Strips and Your Anime Collection
Will LED strips damage or fade my figures?
Compared with many traditional lighting options, modern LEDs used in art and display environments produce less ultraviolet and infrared output and much less heat for the same visible light, which is why museum and gallery professionals are shifting to LED-based systems for sensitive artworks. Some display-lighting experts specifically recommend LED products with built-in UV and IR filtering and good thermal management when lighting delicate pieces. For a figure room, that means choosing quality strips designed for displays, keeping brightness at sensible levels using dimmers, and ensuring there is a bit of airflow so heat does not build up in closed cabinets.
Can I leave the display lights on for hours every day without killing my power bill?
Energy-efficiency resources point out that LED lighting uses up to about 75 percent less energy than traditional bulbs and can last roughly 25 times longer, often on the order of 25,000 to 50,000 hours depending on quality and use. Other educational sources note that because lighting is a noticeable slice of home energy use, upgrading to efficient LEDs offers significant savings potential. In practice, that means you can comfortably run your museum-style strips for several hours every evening while still using much less power than an older incandescent or halogen setup would require for the same brightness.
Bring Your Own Exhibit to Life
A good anime collection already tells a story; lighting is what makes that story visible. By choosing high-CRI LED strips in a unified color temperature, planning layouts that hide the hardware and highlight the figures, and installing everything with museum-inspired care for even, gentle light, you turn shelves of plastic into a curated gallery wall. Start with one cabinet or bookshelf, test how the glow changes your favorite figure’s face and colors, and then roll that success out across the room until stepping inside feels like walking into your own personal exhibit hall.
References
- https://edis.ifas.ufl.edu/publication/FY1049
- https://libres.uncg.edu/ir/uncg/f/ModarresNezhad_uncg_0154M_11588.pdf
- https://www.intrans.iastate.edu/wp-content/uploads/sites/15/2018/12/LED_street_lighting.pdf
- https://cltc.ucdavis.edu/sites/g/files/dgvnsk12206/files/inline-files/2013-title-24-retail-lighting-guide-mar15.pdf
- https://digital.library.unt.edu/ark:/67531/metadc872128/m2/1/high_res_d/1122314.pdf
- https://www.ledsupply.com/how-to-light-shelves-with-led-flexible-strips?srsltid=AfmBOopwMCGYNF091asu_7y1tWCk0WseEAhpUE0RYvDgua_f6_5B-gDx
- https://www.flexfireleds.com/how-to-design-and-install-led-strip-lighting-behind-a-mirror-a-step-by-step-guide/?srsltid=AfmBOop9XFQnBiAFdifvb7w9m8K5Izb3h52RXtQsQQcvn6h7-qPH07Cx
- https://www.signliteled.com/how-to-use-led-strip-lighting-to-enhance-product-displays/
- https://www.stouchlighting.com/blog/designing-with-led-building-lights-tips-for-retail-spaces
- https://www.superbrightleds.com/blog/tips-for-how-to-create-an-aesthetic-room-with-led-lights.html