Understanding Fogging on Transparent Figurine Parts and How to Prevent It
Fogging on clear bases, visors, and effect parts usually comes from moisture or glue fumes, and you can prevent most of it by managing your display climate, adhesive choices, and cleaning routine.
Ever walked past your shelf and felt your heart drop because your favorite figure’s crystal-clear base suddenly looks like frosted candy instead of glassy water? Collectors who keep their clear parts pristine for years almost always share the same habits: a stable display climate, careful gluing, and gentle cleaning instead of random sprays. Here is how to tell what kind of fogging you are seeing and what to change so your transparent parts stay sharp and glossy.
What “Fogging” Really Is on Clear Figurine Parts
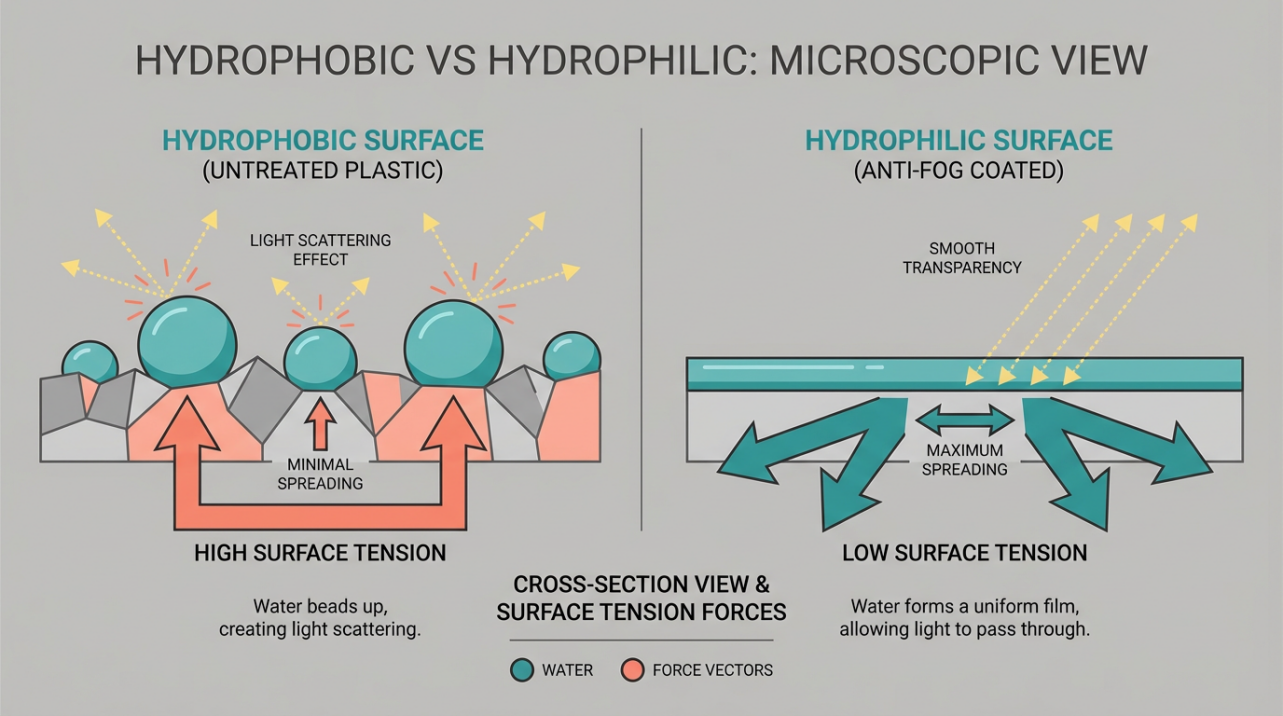
On most clear plastics, fogging is simply tiny water droplets or thin films sitting on the surface because warm, humid air hits a cooler clear piece and the moisture condenses there. It is the same behavior you see on a bathroom mirror after a hot shower or on a misted car windshield in traffic. Anti-fog engineers tame this by changing how water spreads on glass and plastic surfaces through hydrophilic coatings and additives, such as those used in visors and packaging films. Anti-fog solutions for industry are built around this physics: either make water spread into a transparent sheet instead of beads or help it slide off before it can cloud your view.
For figure collectors, though, “fogging” describes several different problems that only look similar at first glance. There is true moisture condensation. There is white, powdery “bloom” from super glue fumes on clear parts. There is internal fogging inside hollow ornaments or effects when moisture sneaks in. Finally, there is long-term material aging where PVC or resin yellows, gets greasy, or turns cloudy because plasticizers migrate out and the plastic slowly breaks down. Moisture-driven internal fogging in hollow ornaments, for example, shows up when humidity sneaks through tiny gaps and condenses on the inside surface, then dries into mineral haze and even mold if the environment swings between damp and dry, which is exactly how collectible ornaments fog from the inside.
Understanding which of these you are facing is the key to choosing the right fix.

Condensation: The Glasses-and-Car-Window Problem on Your Shelf
If a clear support rod or effect part looks misty right after you move a figure from a cool, air-conditioned room into a warmer, more humid one, that is classic condensation. It is the same behavior that makes car windows cloud up when the cabin air is moist and warmer than the glass, and why defogging guides emphasize controlling temperature and humidity instead of just wiping. Car care instructions for foggy glass focus on equalizing inside and outside temperatures, venting humid air, and sometimes applying a defogging treatment, which map almost one-for-one to keeping clear figure parts from constantly misting in closed cases when the room climate swings. Small changes in airflow and moisture control make glass clear again without scrubbing, and the same principle applies to figures.
Clear acrylic risers, stands, and water effects behave similarly. If the air in your room is humid and the cabinet interior is cooler, the clear surfaces become tiny cold plates where moisture sticks and turns into a visible film. Anti-fog developers explain that the real fix is to either reduce the humidity around the plastic or change the surface so the water cannot break into light-scattering droplets. That is why hydrophilic anti-fog coatings, originally refined for aerospace visors and later commercial eyewear, are designed to turn condensation into a smooth, nearly invisible film rather than a patchy mist. Industrial anti-fog chemistry shows this is controlled surface tension, not magic.
Super Glue Fumes and the White “Snow” on Clear Plastic
Another kind of “fogging” that haunts figure repairs and custom bases is the white, powdery frosting around clear joints after using cyanoacrylate super glue. Adhesive specialists describe this as blooming: unreacted glue vapors drift out of the joint and re-polymerize on nearby surfaces, especially on clear plastics like acrylic and polycarbonate, leaving a frosted look and sometimes micro-cracking in stressed areas. A technical guide to cyanoacrylate on clear parts explains that standard ethyl-based formulas are volatile enough that fumes travel, attach to cool plastic surfaces, and cure into a visible haze, which is why low-odor, low-bloom cyanoacrylates were developed specifically to avoid this issue while keeping bond strength high.
Model-aircraft builders see the same thing when canopies fog under masks or after installation. If cockpit parts were glued with CA and not fully cured, the trapped fumes later condense on the underside of the clear canopy and leave a cloudy film, especially when the canopy area is sealed quickly and the humidity is high. Experienced builders report that allowing CA joints to cure for several days in a warm, ventilated environment before closing the canopy dramatically cuts that risk, and that persistent fogging beyond about a week often signals a problematic glue formulation rather than normal behavior. Discussions on fogging under canopies make it clear that patience and airflow are as important as glue choice.
Hobbyists have also popularized a clever shield: dipping clear parts in acrylic floor finishes like Future or Pledge to wrap them in a thin, sacrificial coat before gluing so that fumes attack the coating instead of the base plastic. A widely shared trick for aircraft canopies is to dip, let the piece dry dust-free, then attach it with super glue; the clear gloss layer not only protects against fogging but can be re-dipped if fingerprints or scratches show up later. A detailed walkthrough of using floor gloss as a barrier confirms that clear parts can survive cyanoacrylate bonds with their clarity intact when this step is done properly. Barrier-coating methods and similar canopy-gluing stories on modeling forums repeat the same theme: protect, then glue.
Internal Fogging in Sealed Bases and Ornaments
Some anime figures have hollow, sealed elements such as snow-globe-style bases, water effects filled with glitter, or decorative globes. When these fog internally, wiping does nothing because the haze is inside the cavity. Conservation-style advice for fogged glass ornaments explains that micro gaps around caps or micro-cracks in older pieces let humidity creep in, then that moisture condenses on the cooler inner surface and dries into mineral films, mold webs, or etched cloudiness. Over multiple seasons of temperature swings, the damage compounds, and the interior can stay hazy even when dry.
For figure collectors, a sealed acrylic water base on a shelf above a radiator or near a window can go through the same cycle. Warm, moist room air finds its way in, condenses on a slightly cooler interior wall, and eventually leaves a permanent ghost. Once you see droplets forming inside after a rapid change from a cold storage area to a warm room, that is usually the warning sign that the piece needs more stable storage if you want to avoid long-term clouding.
When It Is Not Fogging at All: Aging PVC and Resin
Sometimes the “fog” on a clear part is really slow material aging rather than moisture or adhesive vapor. PVC manufacturers and toy preservation guides note that high temperature, UV light, and humidity cause PVC to yellow, exude plasticizers, and become sticky or greasy on the surface, especially on lighter colors and clear pieces. That is why collectors are warned that greasy film is the first stage of aging, not just dirt. A detailed breakdown of PVC aging points out that once plasticizers migrate out under heat and light, the material loses elasticity and toughness and can crack more easily, while the surface looks dull or cloudy even after cleaning.
Resin and PVC statue specialists recommend treating these pieces like fragile art rather than toys, emphasizing that the best defense is a stable environment and minimal cleaning because aggressive scrubbing and harsh chemicals often do more harm than the original discoloration. Collecting-focused care guides suggest keeping statues between about 59°F and 77°F in rooms with moderate humidity, out of direct sunlight, and preferably in enclosed glass or acrylic cabinets with UV-safe lighting so dust, UV, and temperature spikes do not get a chance to start that cloudy, brittle look. Statue care tips consistently frame prevention as the main strategy.
To sanity-check what you are seeing, wipe a small area with a barely damp microfiber cloth. If the haze vanishes and returns only in humid conditions, you are fighting condensation. If it remains, especially alongside yellowing or stickiness, you are likely looking at aging or glue damage.
Preventing Fogging When Building or Repairing Figures
Pick the Right Adhesive for Clear Parts
Clear pegs, bases, visors, and acrylic rods tempt people to reach for whatever glue is closest, but some glues are almost guaranteed to cloud things over time. Experienced scale modelers strongly favor PVA-type glues or specialized clear-parts cements for transparent windows and canopies because these water-based adhesives dry clear, do not release fumes that fog plastic, and allow easier cleanup if something goes wrong. A long-running canopy-gluing discussion makes this preference blunt: regular wood PVA dries clear and avoids the heartbreak of fogged canopies completely. Clear-part glue recommendations translate well to figure stands and effects.
When you truly need the strength and gap-filling of cyanoacrylate, the trick is to pick low-odor, low-bloom formulas specifically tuned for clear plastics. Adhesive manufacturers explain that these use less volatile monomers so fewer fumes escape, significantly reducing white haze and crazing while still curing fast and strong. That makes them ideal for tight clear-plastic seams where standard super glue would frost everything nearby. Clear-plastic bonding guides recommend replacing regular ethyl-based CA with these low-bloom versions whenever optical clarity matters.
In practice, that means using PVA or clear parts cement for things like clear logos and nameplates, and reserving low-bloom CA for hidden joints inside bases or deep peg holes where you can keep the glue away from exposed surfaces. Applying the tiniest possible amount with a pin or needle, rather than squeezing from the bottle, makes a huge difference in how many fumes escape and how much cleanup you face.
Shield Clear Parts Before You Glue
There is a reason aircraft modelers talk about “Future-dipped” canopies like a protective buff. By dipping a canopy or clear part in an acrylic floor gloss, letting it dry, and then gluing, they add a thin, glossy sacrificial layer. If cyanoacrylate fumes or stray glue touch it, the coating takes the hit and the underlying plastic often stays clear and polishable. One widely shared method shows clear parts dipped in floor gloss, dried inside a covered container to keep dust off, then safely glued with super glue, with the option to re-dip if fingerprints or scratches appear later. Protective dipping techniques demonstrate that this is not just theory; it is a routine upgrade for clear parts.
Other builders combine this barrier with disciplined gluing. They wax or gloss-coat both sides of the clear piece, buff it to clarity, then tack it in place with tiny dots of CA at corners before reinforcing the rest of the joint with a safer canopy glue around the perimeter. That approach has been proven on tricky car windows where parts needed to flex into place and stay under tension without frosting, and the same trick translates well to large anime figure bases or clear effect shields that need both strength and clarity. Step-by-step examples from car modeling communities show that using wax plus tiny CA dots plus canopy glue can hold even slightly forced fits without fogging.
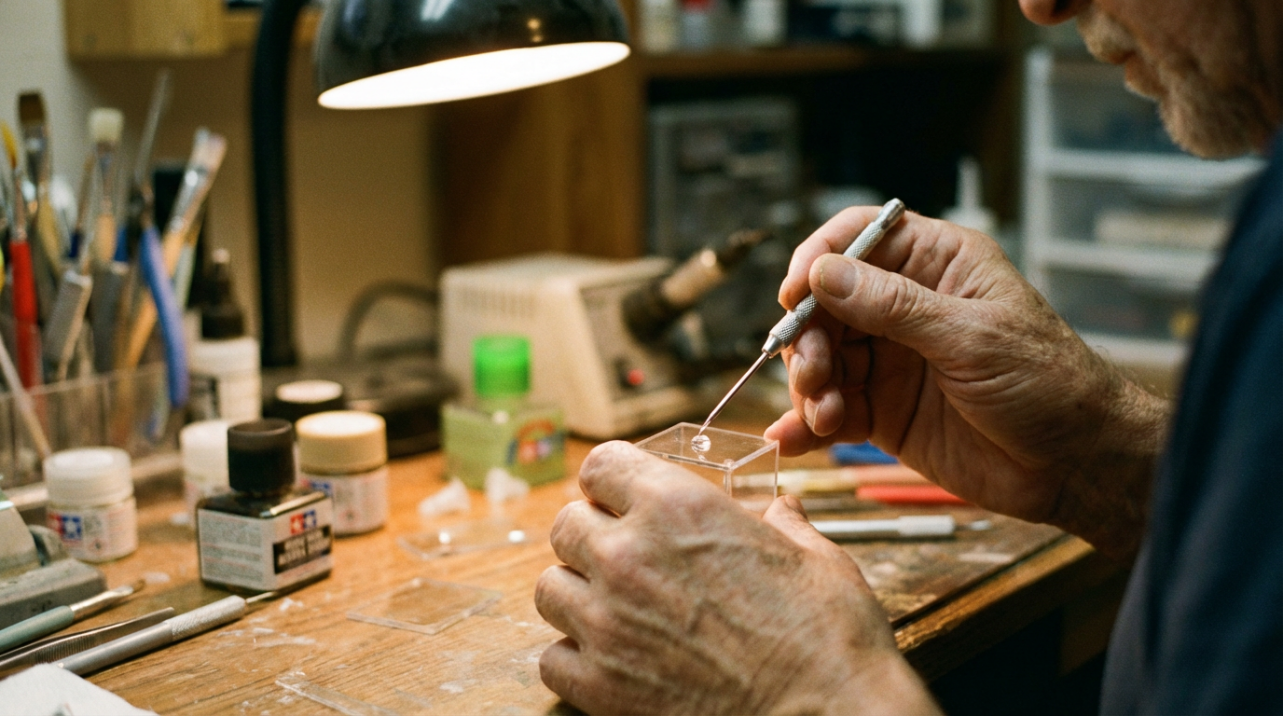
For a typical 1/7 scale figure with a clear acrylic base, that might mean polishing the base, dipping it in a clear acrylic gloss if you are comfortable with the process, letting it cure fully, then using clear PVA or canopy glue for the main peg joints and only a micro-dot of low-bloom CA deep in the peg hole if you absolutely need extra strength.
Give Glue Time and Air Before Sealing in a Case
Even with the right glue and a protective coating, timing and ventilation can make or break a clear part. Canopy builders who have wrestled with fogging recommend letting freshly glued cockpits sit in a warm, slightly humid but well-ventilated environment for three to four days before masking, painting, or closing anything up, and sometimes up to a week if there is heavy CA use. That gives fumes time to dissipate rather than condense later on the clear surfaces. Experiences shared around canopy fogging under paint masks highlight that rushing this step is one of the biggest causes of delayed haze.
The same logic works for figures. If you have just glued a clear support rod or swapped a broken peg using cyanoacrylate, resist the urge to immediately pose the figure back in a sealed acrylic case or box. Instead, let the repair sit out on a dust-safe shelf for several days in a stable room, ideally with gentle air circulation and no direct sunlight, before closing it up. Collectors who bagged freshly glued clear acrylic tokens in a warm, humid environment reported extreme fogging because the fumes were trapped and concentrated; by contrast, the same tokens glued with clear-safe adhesive and dried in lower humidity at around 70–80°F stayed clear. Those anecdotes from gaming token builders show how much environment and patience matter around CA.
A simple rule of thumb helps: any time you can still smell super glue around a figure, it is too soon for that piece to go back into a closed case.
Display and Cleaning Habits That Keep Clear Parts Crystal
Set a Calm, Stable Climate for Your Collection
Clear parts live their best life in the same conditions that preserve paint and PVC. Resin and PVC statue guides suggest a comfortable room range of roughly 59–77°F with moderate humidity, away from radiators, fireplaces, and damp corners, and preferably inside enclosed glass or acrylic cabinets that block casual dust and drafts. Collectors are encouraged to use a simple digital thermometer and hygrometer in their display rooms so they can see when temperatures spike above that range or when humidity climbs into mold and condensation territory. Environment-focused statue care stresses that climate control does more than any cleaning routine.
PVC preservation advice adds that high temperatures and UV light not only fog and yellow surfaces but also drive plasticizers out of the material, creating that greasy or sticky feel on the surface and making the piece more brittle over time. That is why collectors are warned to avoid hot windowsills, uninsulated attics, and shelves right above heaters. A breakdown of PVC toy aging recommends controlling humidity alongside temperature because repeated moisture exposure and drying cycles can chip and roughen surfaces, especially on older pieces.

In practice, this means placing tall cabinets a bit away from outside walls and windows, using UV-filtering film or curtains when figures have to be near natural light, and slipping a small rechargeable silica gel canister or desiccant pack into each cabinet to keep humidity in the sweet spot without baking the figures. If your room regularly climbs into the mid-80s°F in summer, even a small portable AC or dehumidifier can pay for itself in saved figures over a few years.
Avoid Lighting and Gear That Cook Your Clear Bases
Lighting is a double-edged sword in figure displays. Statue care articles recommend UV-free LED lighting because it gives bright, even illumination without pumping out much heat or harmful UV, unlike older halogen spots or direct sunlight that can cook one patch of a clear base or effect over time. Collectors are urged to avoid placing figures under hot downlights or in sunbeams because those localized hot spots warp plastic and accelerate both yellowing and fogging-like cloudiness far faster than the overall room temperature suggests.
The same caution applies to room gadgets. A warm mist humidifier parked right next to a glass display can push humid air across cool clear parts over and over, re-creating the worst-case car-window scenario inside your shelf. If you need humidification for yourself, it is worth positioning those devices on the opposite side of the room from your collection and letting the air mix before it reaches your display.
Smart Cleaning and Anti-Fog Treatments
Good cleaning keeps clear parts from looking dull, but the goal is always minimal friction and minimal chemistry. Anti-fog engineers and lens-care specialists recommend blowing off loose dust first, then wiping with a soft microfiber cloth and, if needed, a mild detergent solution so hard grit does not get dragged across the surface. Guides to anti-fog eyewear cleaning emphasize rinsing with cool water, using gentle cleansers, and patting dry before applying any anti-fog product because scratches and residue can make fogging worse. DIY anti-fog cleaning routines show how this gentle prep extends beyond just glasses.
DIY anti-fog mixes that combine water, rubbing alcohol, and a drop of dish soap work by leaving a thin, invisible film that changes how water spreads so it is less likely to bead into visible droplets, but they are temporary and need reapplication. Articles comparing rubbing alcohol mixes and commercial sprays note that alcohol can strip certain coatings if overused and that purpose-made anti-fog sprays usually last longer and give more consistent clarity. Lens-care discussions and similar anti-fog comparisons frame alcohol-based DIY as a short-term fix, not a permanent solution.
For figures, that suggests a hierarchy. Start with simple dusting using a clean, soft makeup brush or microfiber cloth. Only when needed, use a tiny amount of diluted, unscented dish soap on a damp cloth to lift skin oils from clear parts, wipe gently, and rinse with a lightly dampened cloth rather than fully soaking the piece. Once it is completely dry, a small amount of an anti-fog spray formulated for glass and plastic can be applied following the instructions for goggles and optics, which usually means spraying onto a soft cloth, spreading a thin layer over the clear part, waiting briefly, and then buffing to clarity. Multi-surface anti-fog sprays are marketed for everything from eyeglasses to binoculars and plastic lenses, stressing streak-free clarity when applied to clean surfaces and reapplication as needed. Commercial anti-fog sprays are designed to act as a more durable version of the DIY soap film.
Always check manufacturer advice for your specific figure or material, especially for painted clear parts, and spot-test any new spray on an inconspicuous area first. Some statue-care guides explicitly warn against random household cleaners and untested coatings because they can react badly with certain paints or clear plastics. Resin and PVC care notes lean heavily toward “less is more.”
Can You Rescue a Part That Is Already Fogged?
Moisture Fogging on the Surface
If fogging appears or worsens after temperature and humidity swings, and wiping a small patch with a clean microfiber cloth clears it, you are probably dealing with surface condensation. The first fix is to stabilize the environment: let the figure sit in its cabinet or box while everything gently equalizes to room temperature, the same way car-care advice suggests cracking windows or adjusting HVAC to match interior and exterior conditions before attacking fogged glass. Car defogging guides stress that simply blasting heat or cold without controlling moisture just moves fog around.
Once temperature and humidity are under control, lightly wiping with a dry microfiber cloth should clear remaining film. For chronic cases in very damp climates, consider adding silica gel packs inside display cabinets and storing figures in climate-controlled rooms similar to ornament collectors who keep fragile glass pieces in spaces around 60–70°F and 40–50% relative humidity with desiccants in each box to avoid internal fogging and mold. Ornament-care checklists show that this simple setup keeps delicate, sealed decorations clear for years and works well for figure bases too.
White CA Haze on Clear Plastic
White frosting around a glued joint that does not change when wiped and that appeared after a cyanoacrylate repair is almost certainly glue blooming. Adhesive specialists explain that the underlying cause is volatile monomers traveling and curing on nearby surfaces, and they recommend switching to low-bloom formulas for future repairs to avoid this outcome.
Collectors and hobbyists have had mixed success cleaning existing haze. Some report that carefully applied cyanoacrylate debonder lifted the white film from acrylic tokens at the cost of a lot of patience and cotton swabs, while others found that polishing with plastic-safe compounds or clear acrylic gloss only partially hid the damage. A common fallback is to sand and polish hidden areas, then re-dip or clear-coat the part to recover some shine, similar to how model canopy builders restore scratched or slightly fogged canopies with additional coats of acrylic floor gloss after polishing. Barrier-coating guides for clear canopies state that re-dipping restored clarity even after minor mishaps.
If a clear part became heavily frosted after being glued and then sealed immediately in a warm, humid container, the damage is often deep, and replacement may be the only truly clean fix. The silver lining is that once you have seen that outcome, it becomes much easier to justify the extra cost of low-bloom CA or the time spent setting up PVA and canopy glues for clear work.
Internal Fogging and Deep Damage
Internal fogging inside sealed bases, globes, or water effects is the hardest to recover. Ornament restoration write-ups describe advanced methods where the piece is carefully opened, rinsed with a distilled water and isopropyl alcohol mix, dried with filtered air, and then resealed with a tiny bead of clear epoxy, but they emphasize that this is risky and best reserved for lower-value items or work done with professional conservation advice. The same sources suggest that internal fogging plus musty odor can signal mold that requires gloves and caution, another reason not to rush into DIY surgery on expensive pieces.
For high-value figures with slightly fogged internal elements but no signs of active moisture or mold, many collectors simply focus on preventing further damage. They move the piece into a stable, cooler room, ensure humidity stays moderate with desiccants, and accept a bit of internal haze as patina rather than risk cracking or leaking by opening it. That choice may not be emotionally satisfying, but it often protects the rest of the figure and its long-term value.
FAQ for Foggy Figurine Parts
Why did my brand-new figure’s clear base fog up right after unboxing in winter?
If the figure came from a cold truck or warehouse into a warm, humid room, the clear base likely became the first cool surface for moisture to condense on. Letting the boxed figure sit closed for several hours to reach room temperature before unsealing, then keeping the display room in a comfortable, moderate humidity range, usually prevents repeat episodes in the same way careful ornament storage avoids internal fogging after seasonal moves.
Is it safe to use glasses anti-fog spray on my figures’ clear parts?
Many anti-fog sprays are designed for glass and plastic optics and can work on clear bases or visors, but only when the surface is clean, completely dry, and free of sensitive paint, and only if the product is compatible with that plastic. Anti-fog guides stress matching the formulation to the substrate and avoiding harsh chemicals or abrasives that can damage coatings, so it is wise to spot-test on an unseen area and follow instructions for optics exactly. Anti-fog product guidance and multi-surface spray descriptions for lenses and scopes show that compatibility is the key detail.
Why do some collectors swear by floor gloss dips while others avoid them?
Acrylic floor gloss barriers like Future or Pledge can dramatically protect clear parts from glue fumes and can restore shine, as many canopy builders have demonstrated, but they also add a maintenance layer that can be scratched, attract dust if not dried carefully, or interact unpredictably with certain paints and plastics. Those who have seen success usually follow a strict process of dipping, dust-free drying, and gentle handling, while those who have had bad experiences often rushed drying, used incompatible products, or struggled with accidental pooling. Guides from aircraft and car modelers that show smooth, repeatable results highlight the importance of practice and patience.
Crystal-clear bases, stands, and effects are part of the magic that makes a figure feel like it just jumped out of a scene, and keeping them that way comes down to a handful of habits: treat super glue like a last resort around clear parts, give any repair time and air before sealing it away, keep your display climate calm and UV-light gentle, and reserve cleaning and anti-fog products for those moments when simple dusting will not do. Do that consistently, and those transparent parts will keep catching the light like the day you unboxed them every time you walk past your shelf.