Understanding Resin Leakage in Collectible Figurines and Models
Resin leakage in figures usually comes from uncured or trapped resin escaping through weak spots or hollow cavities. With better casting habits, smarter 3D print design, and safe cleanup, you can stop the ooze without sacrificing your collection.
You notice a shiny puddle under a favorite scale figure or a sticky line creeping out of a garage kit seam, and suddenly it feels like your character is quietly dissolving on the shelf. Across resin-art troubleshooting, conservation research on sculptural plastics, and countless hobby repairs, the same handful of problems show up every time a piece starts to “weep.” This guide explains what that leak really is, how serious it is for both you and the model, and the practical steps that actually work to fix and prevent it.
What Resin Leakage Really Is in the Figurine World
For figurines and models, resin leakage typically means uncured or still-fluid resin is escaping from somewhere it was supposed to stay hidden, whether that is inside a hollow body cavity, trapped in a mold seam, or pooled under a base. In fresh casts and custom kits, that often traces back to a bad mix ratio, cracks in the mold, or overfilling so the resin forces its way out along the weakest edge. In 3D printed figures, it can be liquid photopolymer trapped in hollow sections that never got a proper vent or drain path and slowly works its way out through pinholes or thin walls.
A second, quieter version of “leakage” is the figure that never quite stops feeling tacky in certain spots. Epoxy troubleshooting guides point out that resin which does not fully cure—usually from inaccurate measuring, incomplete mixing, or working in a room well below about 70–75°F—stays soft, collects dust, and can smear when pressed instead of behaving like a hard shell. That is not magical “sweat” from the figure; it is simply chemistry that never finished, and the same under‑cured zones can ooze through joints or seams whenever the model is slightly warmed or stressed.
Over longer timelines, there is another layer to the story. Polymer-aging research on epoxy vinyl ester resins used in contemporary sculptures shows that light, temperature, oxygen, and humidity slowly change the resin network, affecting its mechanical properties and surface behavior over time polymer-aging research on epoxy vinyl ester resin. Studies on bio-based resin and wax coatings for wood also describe aging as slow degradation under UV light and moisture, with coatings losing color and durability as components leach out of the film bio-based wood coatings. For figurines, that means older pieces can show discoloration and surface changes that make any original casting problems more obvious, even if they are not literally “bleeding” fresh resin years later.
To ground all of this, it helps to map the main leak scenarios collectors actually see.
Leak scenario | What you notice | What is happening | First move |
|---|
Fresh cast or garage kit part | Resin beading along a seam, pooling under a mold line, or dripping | Mold gap, overfill, or bad seal letting still‑liquid resin escape | Move the piece onto a protected surface and contain the spill before it cures |
Hollow 3D printed character or base | Occasional drips from a pinhole, vent, or hairline crack in the base | Trapped liquid resin in an internal cavity finding a path out because vents or drains are inadequate | Isolate the figure, let remaining resin drain, and plan a controlled repair of the vent area |
Finished painted figure or statue | Sticky or glossy patches that never fully harden and attract dust | Under‑cured resin or coatings at the surface, sometimes combined with slow material aging | Avoid handling, clean gently, and improve curing or sealing rather than just wiping repeatedly |
Core Causes: Why Figurine Resin Leaks or Stays Wet
Uncured or poorly mixed resin
Epoxy and casting resins depend on a precise resin‑to‑hardener ratio. Troubleshooting work on epoxy systems repeatedly finds that resin that never fully cures—or only partly cures—is usually tied to inaccurate measurements or incomplete mixing, not some mysterious “bad batch.” Makers who pour by eye, rush the stir, or scrape the mixing cup only once are essentially guaranteeing zones where the ratio is off, and those zones can stay soft and mobile long after the rest of the piece has hardened.
Temperature and batch size stack onto that problem. Resin and workspace that are too cold slow the chemical reaction so much that the working time stretches, the resin stays liquid longer, and leaks keep creeping out of seams you thought were safe. When the room and materials sit around 70–75°F and the parts are measured accurately in graduated cups or on a scale, the same formulas usually cure into hard, leak‑resistant pieces instead of tacky messes. If you regularly see “wet” patches days after demolding, assume a mix or temperature issue and fix that before you blame the mold or the brand.
Resin viscosity also plays a role. Very low‑viscosity formulas are excellent at flowing into tiny details, but that same runniness makes them eager to sneak through microscopic gaps in molds, bezels, or seams. Higher‑viscosity (thicker) resins are less likely to seep through tiny imperfections, so they are often the better choice when you know your mold or seal is not perfect, or when you are working on a base or diorama where raw leak lines would be very visible.
Weak molds, hollow cavities, and pressure
Leak stories from resin jewelry, woodworking “river” tables, and toy customs all echo the same lesson: if there is even a hairline path out of the form, resin will find it. Woodworkers who pour epoxy into slabs are told to build their forms from smooth panels, seal every seam with overlapping tape, and then run a bead of silicone along all edges so the liquid cannot escape under pressure before curing. When those steps are skipped, the result is familiar to figure makers too—resin creeping out the bottom, wasted material, and voids in the finished piece.
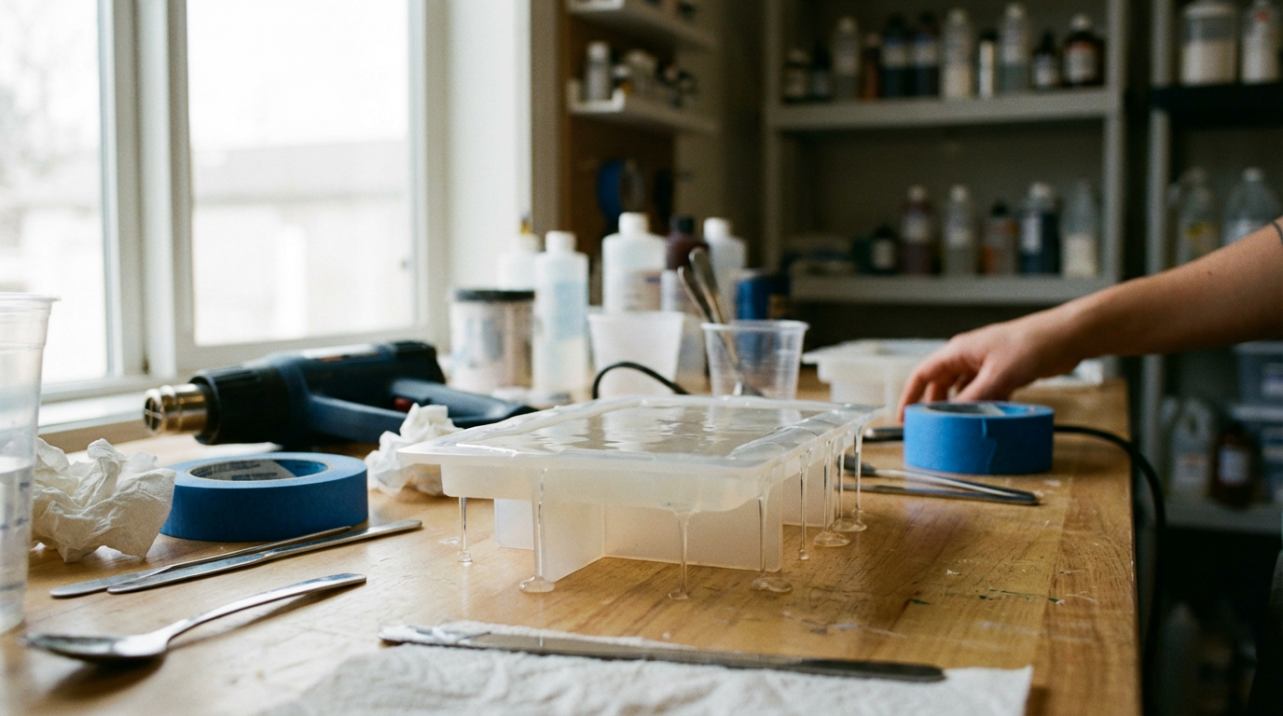
Small resin charms and open bezel pieces behave the same way. Makers who do not seal the underside with proper tape or a glue barrier see resin leaking out along the frame, leaving a thin, disappointing film instead of a crisp, glassy fill. The fix there is robust sealing, a level work surface, and thin, staged pours rather than dumping a deep layer at once, because shallower layers create less pressure on any weak spot in the seal.
For collectible models, hollow 3D printed parts add yet another failure mode. Experience from SLA miniature printing shows that tiny figures around tabletop scale generally should not be hollowed at all, because thin walls and fine details make failures and trapped resin much more likely, while solid pieces add useful weight so they stay planted on the table. Larger busts or vehicles can be hollowed safely, but only if you design proper interior geometry and venting so resin and air can move freely during printing. Practitioners recommend at least one air inlet at the very top of the internal cavity in the print orientation and one or more drainage vents at the lowest points, with no part of the vent channel narrowing more than the holes themselves. For many hobby setups that translates into vent holes roughly the size of about 1/16 inch for thin resins and closer to a little over 1/8 inch for thicker resins, with some makers going up toward roughly 3/16 inch where it will not be seen to improve reliability.
If you hate visible vent holes, there are still options. One is to design the part like a “cup,” removing the face that will sit on the table and orienting the model so that open side faces sideways during printing, letting gravity and motion flush out resin. Another is to be present when a print finishes so you can rotate it and let trapped resin run back into the vat before it gels, though this demands careful timing and is easy to miss if you print overnight.
Environment, aging, and leaching
Even when a casting starts life perfectly, resin is not frozen in time. Polymer-aging research on epoxy vinyl ester resins in contemporary art sculptures highlights that long-term exposure to light, temperature fluctuations, oxygen, and ambient humidity slowly changes the material, affecting color and mechanical strength polymer-aging research on epoxy vinyl ester resin. A broad review of natural and bio-based resins and waxes used as wood coatings notes similar patterns: UV light and outdoor conditions drive photo‑oxidation, color change, and erosion of water‑repellent properties, especially when components can leach out of the coating over time bio-based wood coatings.
For resin statues and figures, this does not usually mean dramatic puddles years later, but it does mean the surface can become more brittle, more matte or chalky, or more sensitive to heat. Any protective varnish, wax, or added coating on top of the figure is essentially another polymer film that can age in its own way. Studies comparing wax, resin, and acrylic sacrificial coatings on marble sculpture found that some mixtures darkened surfaces or developed subtle color shifts over time, and that their removability after aging was not always perfect even when they appeared to come off cleanly. When you think about spraying or waxing a whole figure to “protect” it from leaks or dust, those tradeoffs—appearance changes and reversibility—are worth keeping in mind.
Fixing a Leaking Figurine Without Destroying It
Emergency containment and safe cleanup
When you catch a leak in progress, the priority is to protect both the figure and everything around it. Slide the base onto a disposable tray or thick scrap cardboard so any fresh resin does not bond to your shelf. Put on disposable gloves so you are not spreading sticky resin with your fingers, and blot up excess with lint‑free paper towels or rags rather than smearing it across painted areas. Resin-art guides recommend acting as soon as possible, because once the resin cures hard, you are in grinding and carving territory instead of gentle removal.
If the leak is coming from an unpainted surface, such as the underside of a raw garage kit part, a small amount of acetone or denatured alcohol on a cloth can help lift uncured resin while it is still soft, provided you have good ventilation and keep the solvent off skin and eyes. Where paint is present, be conservative: the same solvents that clean resin can attack acrylic layers or inks, so it is safer to stick with mechanical removal, wiping away what you can and letting the remainder cure fully so it can be sanded and repainted rather than risking a smeared, cloudy patch.
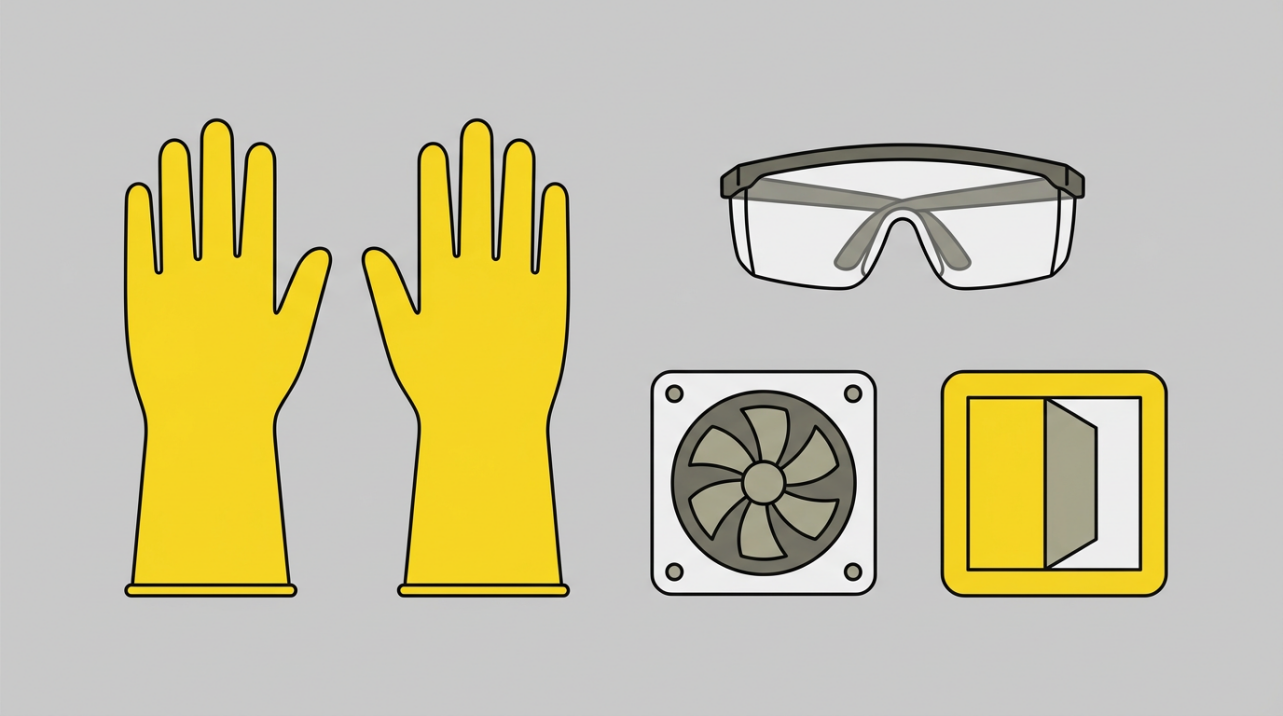
Because many resins and solvents release fumes, art-studio safety guidance for ceramics and kiln rooms strongly emphasizes ventilation, avoiding food and drink in the work area, and using appropriate eye and skin protection when working with hazardous materials art-studio safety guidelines for ceramics and kilns. Comprehensive studio safety guides echo that combination of fresh air, gloves, and safety glasses as a baseline for any resin or solvent use, especially in small indoor spaces comprehensive safety guides for art studios. Your figures may be cute, but the chemistry around them deserves the same respect.
Stabilizing and repairing the damage
Once the leak is stopped and the remaining resin has fully cured, you can assess structural damage. If resin escaped from a seam and left a gap or cracked joint, repair techniques for resin statues transfer directly. For small, clean breaks on lightweight parts—like a finger, hair strand, or accessory—gel super glue is usually enough. Applying a tiny dot to one side, pressing the parts together firmly for under a minute, and then letting the joint rest for about an hour typically restores integrity without flooding detail, and any squeezed‑out bead can be sanded flush after it dries rather than wiped while wet.
Heavier or load‑bearing repairs, such as a character’s leg at the ankle or a long weapon, benefit from two‑part epoxy adhesive. Mixing equal parts of resin and hardener for roughly half a minute, brushing a thin film on both sides of the break, and then supporting the joint with tape or rubber bands while it sets yields a much stronger bond once the full cure time—often up to a day—has passed. Many experienced hobbyists add “pinning” for these areas, drilling matching holes into both sides, inserting a short piece of metal like a cut paperclip, and gluing it in along with the epoxy so the joint has an internal skeleton instead of relying only on adhesive.
Where a leak has carved out material or left messy voids, two‑part epoxy putty comes into play. Knead the putty until the color is uniform, press it into gaps, and smooth the surface with a wet fingertip so it blends into the surrounding sculpt. Once cured, the putty can be sanded and carved like the original resin, and you can even restore missing details such as chipped armor edges or a lost toe. For clear or translucent effects parts, clear UV‑curing resin works almost like liquid glass, filling chips and cracks with minimal visual disruption when applied sparingly and cured with a UV flashlight.
After structural fixes, surface refinement is what makes the repair disappear on display.
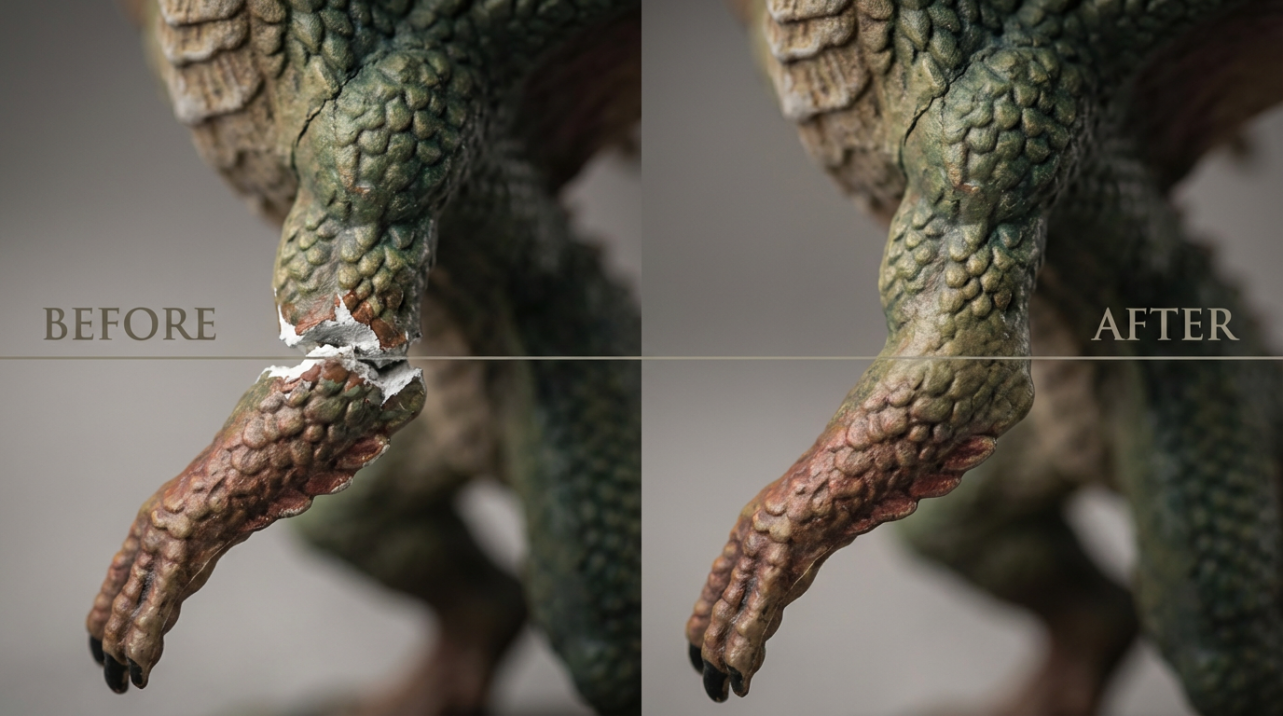
Sand the repaired area with fine grits around 400–600 until you can no longer feel a step with your fingernail between original resin and filler. Then repaint with carefully matched acrylics, remembering that they tend to dry slightly darker than they look wet, and finish by spraying a clear matte or gloss sealer over the repaired area or entire figure so the sheen is consistent. Hot glue, despite its convenience, is best avoided; it remains soft, bulky, and temperature‑sensitive, and any attempt to remove it later usually leaves rough scars that are harder to hide than a proper epoxy repair.
When to accept imperfections or call a pro
Not every leak warrants a full restoration campaign. For mass‑produced prize figures or inexpensive kits, cleaning up the worst mess, touching in paint, and living with a small blemish is often the best balance between time and risk. On limited editions, grail statues, or mixed‑media pieces with fabrics, electronics, or complex bases, there is a real argument for restraint. Conservation work on sculptures shows that even carefully chosen wax and acrylic coatings can change surface appearance and become less reversible over time. When a leak threatens an irreplaceable piece, getting advice from a professional restorer, local museum conservator, or high‑end studio that regularly handles resin statues may save you from well‑intentioned experiments that cause more harm than the leak itself.
Preventing Resin Leakage in Future Builds and Buys
Smarter casting and 3D-printing choices
If you cast your own parts or make custom bases, the single best move is to stay small until you really understand your resin. Both resin-art and woodworking communities warn against jumping straight into huge, deep pours with gallons of epoxy, recommending coasters and test panels to learn mixing, degassing, and curing behavior first. The same logic applies to figurines: start with small accessories, effect parts, and bases to dial in your process before you commit to an entire character body.
Mold preparation is the backbone of leak‑free casting. Smooth, rigid mold walls, careful clamping, and thorough sealing of every seam dramatically cut down leaks that show up only when you pressurize a mold or fill it close to the brim. Wood‑epoxy makers routinely tape the entire inside of their forms, overlap seams, then run a continuous bead of silicone caulk along edges to block resin escapes. In the figure world, the same mindset—using high‑quality silicone molds, reinforcing any suspect joints, and sealing external seams before a full pour—pays off in cleaner casts and far fewer panic moments with resin pouring out the bottom.
For 3D printed resin figures, treat hollowing as a deliberate design choice, not a default. Small minis around 5/8–1 1/2 inches high are usually better printed solid, both to avoid failures and trapped resin and to give them enough weight to feel good on a base. Reserve hollowing for larger models where you can design wide, uncrowded internal channels and place vents thoughtfully. Tilt the model in your slicer so internal low points are obvious, and put drainage holes at those low points in print orientation rather than guessing. If you must hide vents for aesthetic reasons, consider integrating them into mechanical details, base textures, or connection points that will later be covered.
Display, storage, and coatings that help instead of harm
Even if you never pour a drop of resin yourself, how you display figures can reduce future “mystery leaks” and surface issues. Conservation studies on epoxy and related resins used in sculptures underline the importance of controlling light, temperature, and humidity to slow degradation polymer-aging research on epoxy vinyl ester resin. Research into wood coatings with natural resins makes the same point: UV light in the near‑ultraviolet range and repeated moisture cycles drive discoloration and loss of mechanical performance bio-based wood coatings. For your shelves, that translates into keeping figures out of direct window sunlight, avoiding damp basements or attics with wild seasonal swings, and not positioning resin dioramas directly over heaters or in glass cases that routinely get hot.
When it comes to protective topcoats, it is tempting to think “more is better,” but the science suggests nuance. Tests on sacrificial coatings for marble sculptures found that wax-resin mixtures and certain acrylic films offered good stain protection but could noticeably darken or alter gloss on some surfaces and left thin residual layers even after cleaning. For figurines, a light, well‑chosen clear coat applied only where you need extra durability is usually safer than heavy wax layers or repeated experimental varnishes. On high‑gloss characters or fragile paint jobs, sometimes the best “coating” is simply a dust‑proof display case and careful handling.
Finally, do not forget personal safety as part of “prevention.” The same art safety guidance that warns ceramic artists about fumes from kilns and glaze ingredients stresses basic hygiene like keeping work clothes separate, avoiding sanding dusty materials without protection, and ensuring any chemical processes happen in properly ventilated spaces art-studio safety guidelines for ceramics and kilns. Whenever you mix, pour, sand, or cut resin for your fandom projects, treat it with that same respect: gloves, eye protection, fresh air, and no food or drinks on the workbench.
Quick FAQ
Does a sticky spot always mean my figure is leaking resin?
A sticky patch usually means resin or a coating in that area did not fully cure, which can be caused by off‑ratio mixing, poor temperature control, or contamination during manufacture. It can behave like a slow leak because it keeps attracting dust and can transfer to fingers, but it is often a thin surface issue rather than liquid pouring out from deep inside.
Is resin leakage dangerous for my health?
Most cured resins on finished figures are relatively inert, but fresh leaks, uncured drips, and the solvents used to clean them can irritate skin and eyes or cause headaches in unventilated rooms. Studio safety guides for artists strongly recommend gloves, eye protection, and good ventilation whenever you work with resins or solvents, and those same precautions make sense when cleaning up leaks on collectibles.
Should I avoid buying hollow resin figures altogether?
Not necessarily. Hollow construction is normal on many larger statues and busts; issues arise mainly when cavities are poorly designed, under‑vented, or paired with under‑cured resin. If a piece comes from a reputable maker with a track record of good casting, hollow construction is not an automatic red flag, but if you see repeated reports of leaks or soft spots from a specific line, take those seriously.
A resin leak on a beloved character feels like a tiny heartbreak, but it is also a solvable materials problem. With a little chemistry awareness, better venting and mold habits, and the same care you already bring to posing and lighting your displays, you can keep your figures from weeping, your shelves from staining, and your fandom stories focused on the characters rather than the cleanup.